
What Is Omni Channel?
Omni Channel is a tool to manage the priority of work items without writing a code. It’s a flexible, customizable feature.Omni-Channel routes work requests to the most available and qualified support agents in the console.
Where Can This Be Used?
This can be used by people of teams who are managing,
-
-
- Customer Support.
- Call Centers
- Patient Appointment etc.,
-
Steps To Implement Omni Channel:
Enable Omni-Channel
Create Service Channels
-
-
- Create Routing Configurations
- Configure Presence Configurations
- Create a Presence Status
- Create Decline Status
- Create Queues & Assign Queues to Routing Configurations
- Provide access to Presence Status
- Add Omni Channel to Console
- Test the Setup
-
1.Enable Omni-Channel
This step is simple – Goto Setup→Omni-Channel Settings→Enable Omni-Channel
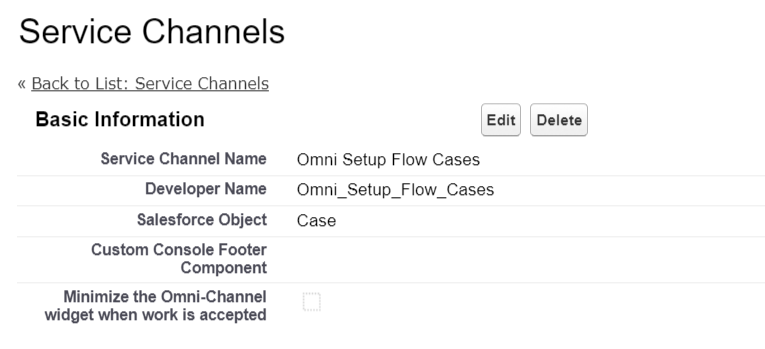
2.Create Service Channels
Service Channels: Service channels let you turn nearly any Salesforce object―such as a case, lead, SOS session, or even a custom object―into a work record.
Goto Setup→Omni-Channel Settings→Service Channels and click ‘New’. I have provided the name ‘Omni Channel Omni Setup Flow Cases.
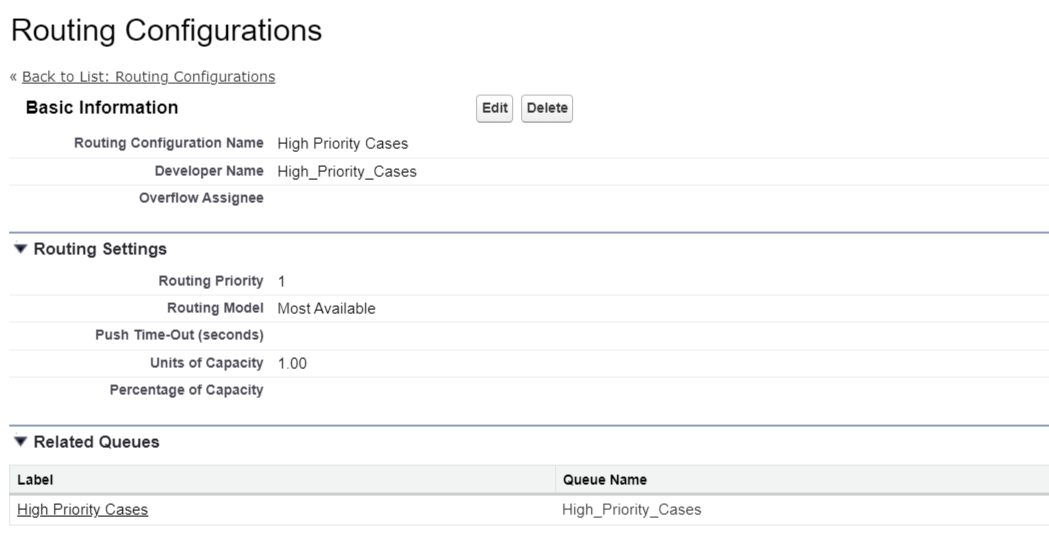
3.Create Routing Configurations
Routing Configurations: Routing configurations determine how work items are routed to agents. Use them to prioritize the relative importance and size of work items from your queues. That way, the most important work items are handled accordingly, and work is evenly distributed to your agents.
Goto Setup→Omni-Channel Settings→Routing Configurations and click ‘New’. I have provided the name High Priority Cases and should be routed to the Agent who is Most Available..
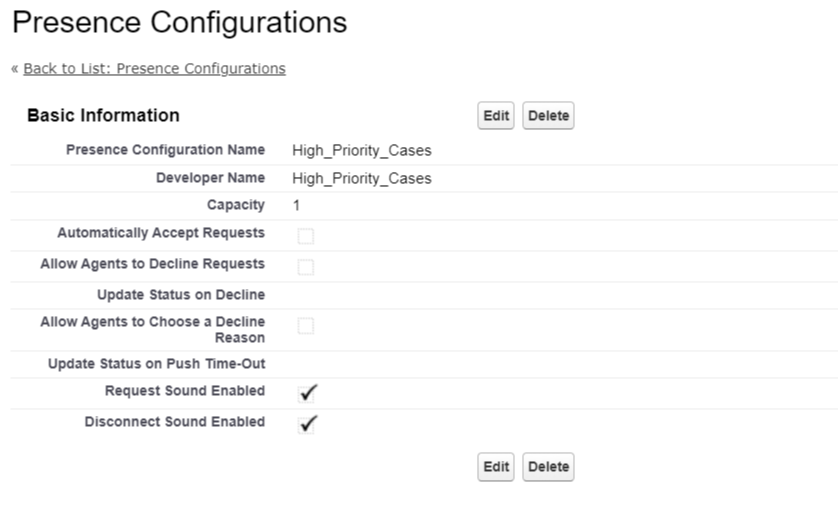
4.Configure Presence Configurations
Presence Configuration: Presence configurations determine how much work agents can take on and the Omni-Channel behaviors while they assist customers. In each configuration, defining how to handle work requests, I have selected the capacity for an agent as 1.
Goto Setup→Omni-Channel Settings→Presence Configurations and click ‘New’ to create the configuration.
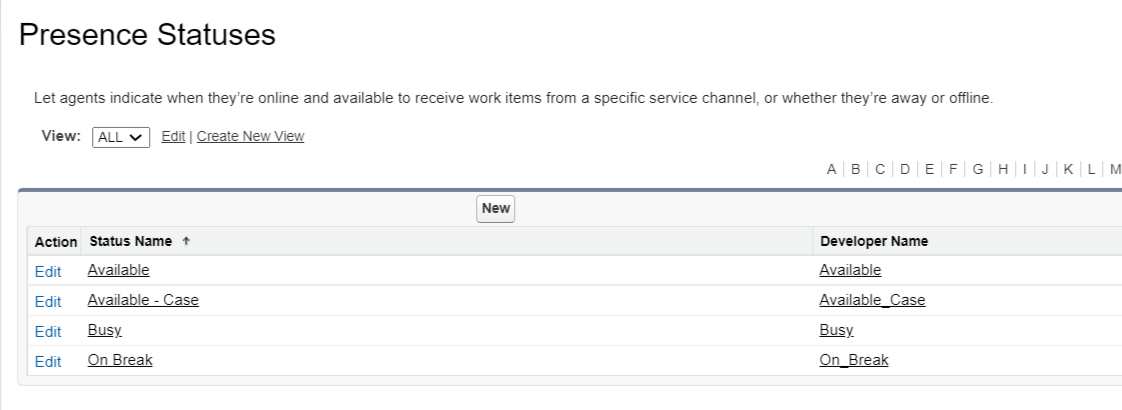
5.Create A Presence Status
Presence Status: It helps you track information about your agents’ availability.
Goto Setup→Omni-Channel Settings→Presence Status and click ‘New’ to create the agent status.
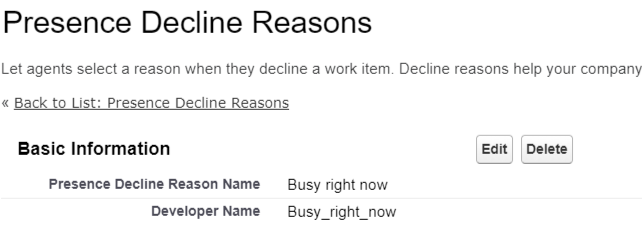
6.Create Decline Status
Presence Decline Status: This helps to track when any of the work is declined by the agents they can send this reason.
Goto Setup→Omni-Channel Settings→Presence Decline Reasons and click ‘New’ to create the reasons
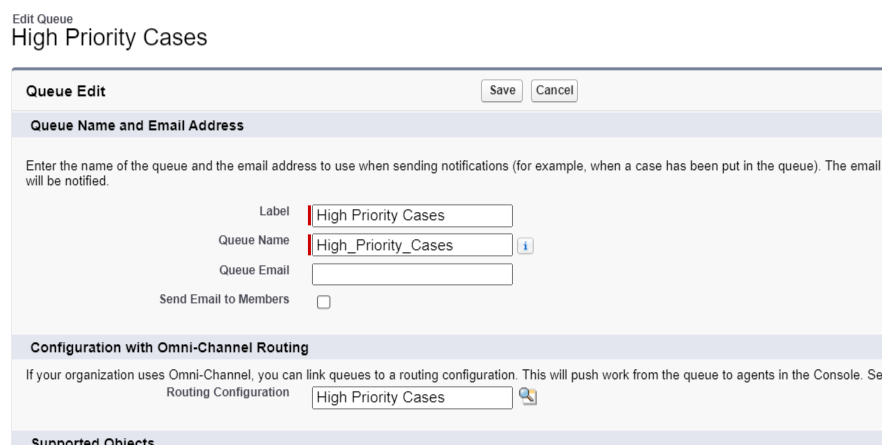
7.Create Queues & Assign Queues To Routing Configurations
Goto Setup→Queues and Click New to create the Queue and assign it to the Routing Configuration.
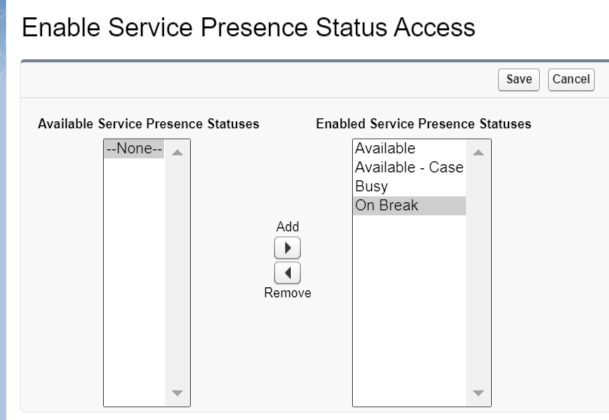
8.Provide Access To Presence Status
Goto Setup→Profile→ Enabled Service Presence Status Access and add the status.
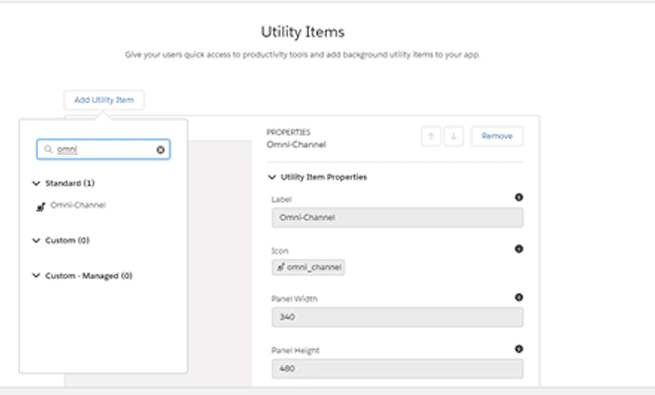
9.Add Omni Channel To Console
Goto Setup -> App -> App Manager.Click Service Console app and Add Omni Channel using “Add Utility Item”.
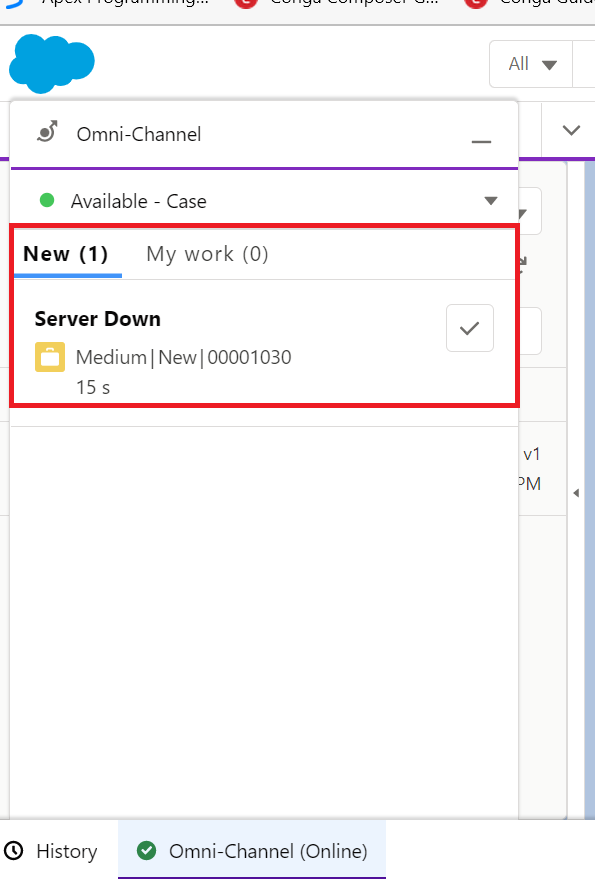
10.Test The Setup
In Service Consoles, there is a Utility Bar item for Omni-Channel. This is where agents log on to Omni-Channel and show themselves as available for work. This is also where new incoming work will display for agents to grab.
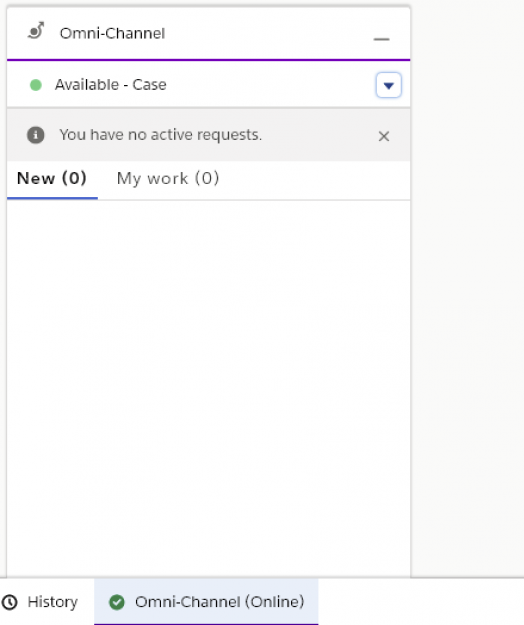
When any new case is created and if it’s assigned to the queue then they will get an audio notification and the work will appear in their Omni-Channel window