
Introduction:
In today’s fast-paced business environment, managing and organizing content efficiently is crucial for any successful organization. Salesforce, as a leading Customer Relationship Management (CRM) platform, provides powerful tools like Data Loader to facilitate seamless data management. In this blog post, we’ll delve into the nuances of utilizing Salesforce Data Loader to upload and link Content Notes via ContentNote and ContentDocumentLink objects.
What are ContentNote and ContentDocumentLink?
ContentNote represents a text-based note in Salesforce, allowing users to store important information directly in the platform. On the other hand, ContentDocumentLink establishes a relationship between Salesforce records and files (ContentNote or ContentVersion). This allows for easy access to files from relevant records.
Prerequisites for Uploading Content Note
Before diving into the Data Loader process, ensure you have the following:
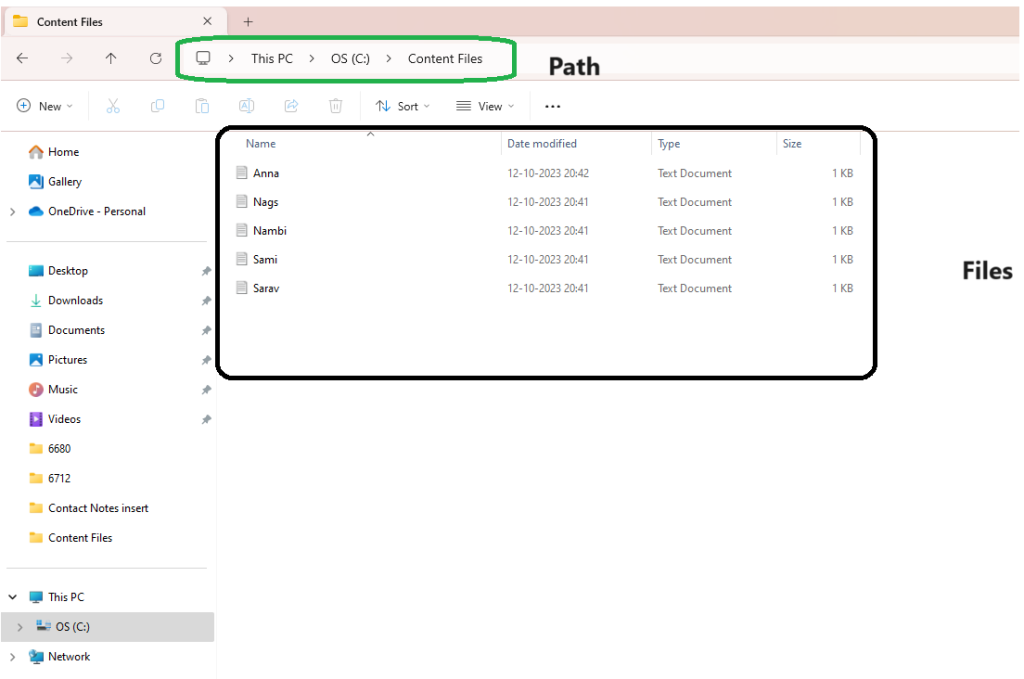
- Text File on Your Local Desktop: The content you wish to upload should be stored in a text file on your local desktop. This file will be referenced in the Excel sheet.
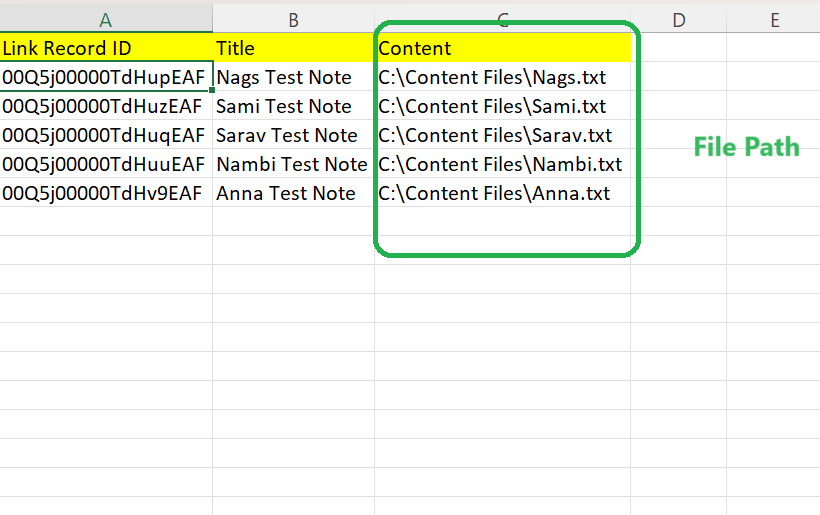
2. Excel File with Content Path Column: Create an Excel file containing a column named Content that specifies the file path of the notes. This will be used as a reference point for Data Loader.
Steps to Upload Content Note using Data Loader
- Login to Salesforce: Open Salesforce and log in to your account.
- Open Data Loader: Launch the Salesforce Data Loader.
- Select Operation: Choose the operation you want to perform. In this case, it will be Insert.
- Select Object Type: Pick ContentNote from the list of available objects.
- Browse for CSV File: Locate and select the Excel file containing the Content column.
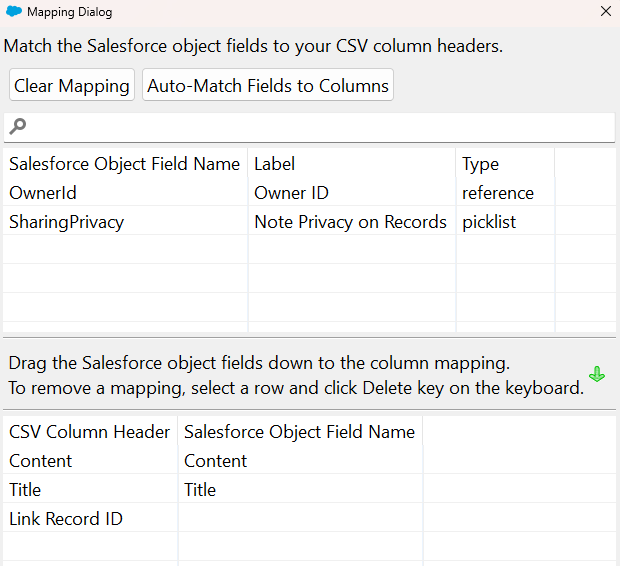
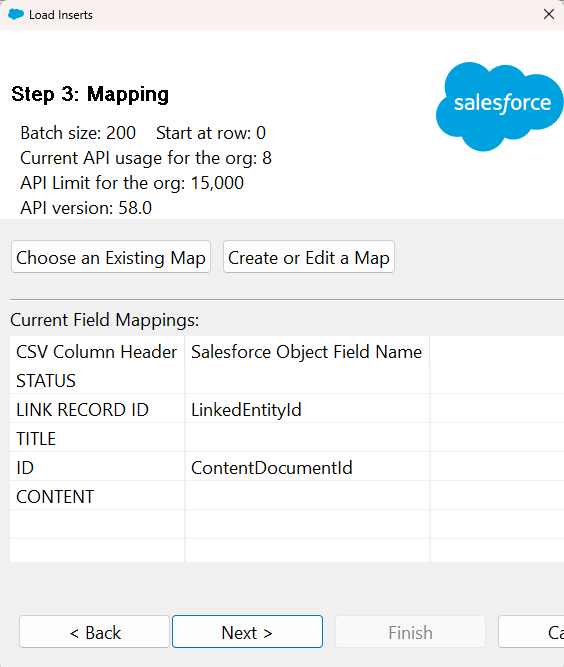
- Mapping Fields: Map the Content in your CSV file to the appropriate field in Salesforce.
7. Start the Insert Operation: Click on the ‘Create or Edit a Map’ button. This will start the insertion process.
8. Monitor Progress: Keep an eye on the progress bar to ensure successful insertion.
9. Review Results: After completion, review the results to confirm that the Content Notes have been uploaded successfully.
Establishing Links with ContentDocumentLink
Now that we have uploaded Content Notes, let’s proceed to link them with relevant records.
- Data Loader Steps: Follow the above steps to insert the ContentDocumentLink.
- Browse for CSV File: Locate and select the Excel file or your success file from the previous insert notes, ensuring it contains a column with the Salesforce record IDs to be linked.
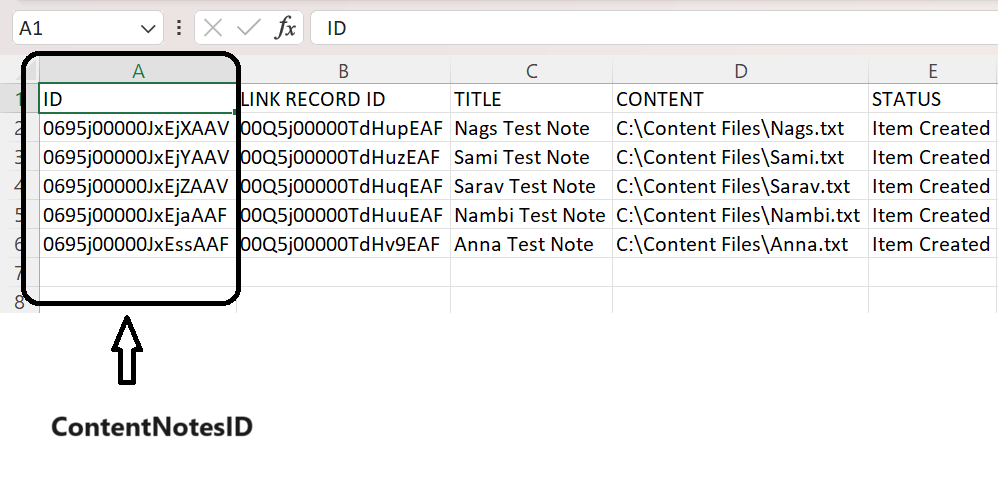
3. Mapping Fields: Map the `LinkedEntityId` (representing the Salesforce record) and `ContentDocumentId` (representing the Content Note) columns appropriately.
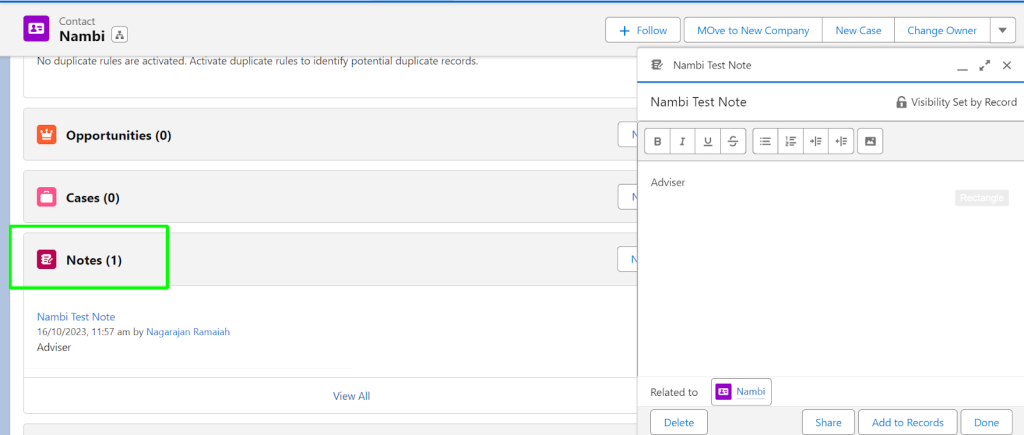
We have successfully uploaded a comprehensive list of notes associated with the contact records. You can conveniently access the contact record-related list, and effortlessly review the uploaded notes.
Conclusion
Effectively utilizing Salesforce Data Loader to upload and link Content Notes via ContentNote and ContentDocumentLink objects can significantly enhance your data management capabilities. By following these steps and ensuring the necessary prerequisites, you’ll be well on your way to optimizing your Salesforce experience.
Remember, a well-organized database with accessible content can streamline your workflow and lead to more informed decision-making. So, start leveraging these powerful Salesforce features today!