Sweet Potato

Categories
Blog

Salesforce’s Fault Path Component: Your Flow’s Unseen Hero!

Imagine you’re a Salesforce admin, seamlessly cruising through the intricate world of flows, designing powerful automation to drive your organization’s success. But suddenly, you hit a roadblock, an error message, or an unexpected outcome, and you’re left wondering, “Where did I go wrong?” Fear not, for the trail to mastery in Salesforce often involves decoding the enigmatic Fault Path Component!

In this adventure, we will embark on a journey to unravel the secrets of the Fault Path Component in Salesforce flows.

The Flow Adventure Begins

Flows are the backbone of automation in Salesforce. They allow us to create dynamic processes without writing code. But like any adventure, working with flows can sometimes lead you into uncharted territories. That’s where the Fault Path Component comes to the rescue!

What is the Fault Path Component?

The Fault Path Component is like your trusty map in this Salesforce adventure. It’s a vital element within a flow that helps you manage exceptions, errors, and unexpected twists in your automation. Think of it as the safety net that ensures your flow keeps running smoothly, even when unexpected errors occur.

When Does It Come into Play?

Imagine you’re creating a flow to update records or send emails. Everything’s going perfectly until an error arises. Perhaps a record doesn’t meet certain criteria, or there’s an issue with sending an email. Instead of your flow crashing, the Fault Path Component helps you gracefully handle these errors.

Tips for Mastering the Fault Path Component

Here are some tips to help you become a pro:

1. Understand Error Types

Familiarize yourself with the different types of errors you might encounter in your flows. This will help you tailor your Fault Path Component’s actions to specific scenarios.

2. Test Thoroughly

Before deploying your flow, rigorously test it to identify potential error scenarios. This way, you can configure the Fault Path Component to handle them effectively.

3. Use Meaningful Messages

When setting up error messages or notifications, ensure they are user-friendly and provide clear guidance on how to resolve the issue. This enhances the user experience and reduces confusion.

Let’s explore the process of incorporating a fault path component, our safety net, into the flow.

Step 1: Build Your Flow

Use Flow Builder to construct your automation. This can involve various elements like Record Updates, Record Creates, Decision elements, and more. For the sake of this example, let’s assume you have a simple flow that updates an account record.

Step 2: Identify Potential Faults

While building your flow, identify points where errors might occur. These could be due to missing data, record not found, or other exceptions.

Step 3: Add a Fault Path Component

To handle errors, click the “Add Fault Path” element. This element represents the path your flow will follow when an error occurs.

Screenshot 1 - Update records
Add Elements
Step 4: Configure the Fault Path Component

Click on the Fault Path element to configure it. You’ll see a section for “Fault Messages” where you can define error messages or explanations that will be shown to users when an error occurs. 

fault path component salesforce
Step 5: Test Your Flow

It’s crucial to thoroughly test your flow, especially the error handling. Trigger your flow with different scenarios to ensure that it gracefully handles errors according to your configurations in the Fault Path Component

Update Account - Salesforce

Using the Fault Path Component in Salesforce Flow allows you to create robust and user-friendly automation that can gracefully handle errors and exceptions, ensuring a smoother experience for both users and administrators. Happy Flowing!!!

Categories
Blog

Google Sheet Integration With Salesforce

Google Sheets, is a cloud-based spreadsheet software that allows users to create and manage spreadsheets online. By integrating Salesforce with Google Sheets, businesses can streamline their data management processes, improve their workflow automation, and enhance their productivity. In this blog, we will explore the Salesforce Connector add-on for Google Sheets and how it can help businesses integrate Salesforce with Google Sheets.

The Salesforce Connector add-on for Google Sheets is a powerful tool that allows you to easily integrate Salesforce with Google Sheets. With this add-on, you can import Salesforce data directly into your Google Sheets, and you can also update and create new Salesforce records from within Google Sheets.

Here are some of the benefits of using the Salesforce Connector add-on:

Easy Data Import: With the Salesforce Connector add-on, you can easily import Salesforce data into your Google Sheets. This makes it easy to analyze and manipulate your Salesforce data in Google Sheets, without having to switch between the two applications.

Real-Time Data Syncing: The Salesforce Connector add-on allows you to sync data between Salesforce and Google Sheets in real-time. This means that any changes made to your Salesforce data will be automatically reflected in your Google Sheets, and vice versa.

Enhanced Data Management: By integrating Salesforce with Google Sheets, you can improve your data management processes. You can use Google Sheets to organize and manipulate your data before syncing it with Salesforce, giving you greater control over your data.

Workflow Automation: The Salesforce Connector add-on allows you to automate workflows and processes between Salesforce and Google Sheets. For example, you can use Google Sheets to automatically create leads or opportunities in Salesforce based on certain criteria.

Here’s how to use the Salesforce Connector add-on for Google Sheets:

Step 1: Open Google Sheets

Open Google Sheets and create a new spreadsheet or open an existing one.

Step 2: Install the Salesforce Connector Add-on

Click on the “Add-ons” tab from the main menu and select “Get add-ons.” Search for the “Salesforce Connector” add-on and install it.

Step 3: Authenticate the Add-on

Once the Salesforce Connector add-on is installed, you will need to authenticate it with your Salesforce account. Follow the on-screen instructions to authenticate the add-on.

Step 4: Import Salesforce Data

Once the add-on is authenticated, you can import Salesforce data into your Google Sheets by clicking on the “Salesforce Connector”
add-on and selecting “Update.” Choose the data you want to insert and configure the settings for the insert.

Step 5: Account Insert

Let’s insert the accounts from Google Sheets into Salesforce. So, please select Account as the object and click the Next button.

Step 6: Map the fields

The next step is to select the mapping on which fields from the spreadsheet need to be imported into which fields on the account object and click the ‘Execute’ button. Please see the screenshot below,

Step 7: Verify the Salesforce result:

The next step is to verify the results in Salesforce by running an account report. Create a report, select the account. Let’s insert the accounts from Google Sheets into Salesforce. So, please select Account as the object and click the Next button.

Conclusion

The Salesforce Connector add-on for Google Sheets is a powerful tool that allows businesses to integrate Salesforce with Google Sheets. With easy data import, real-time data syncing, enhanced data management, and workflow automation, businesses can streamline their data management processes and improve their productivity. To get started with the Salesforce Connector add-on, simply install it from the Google Sheets add-on store, authenticate it with your Salesforce account, and start importing and syncing data between Salesforce and Google Sheets.

Categories
Blog

Sales Path -Salesforce Lightning Experience

Salesforce Sales Path is a feature of the Salesforce Lightning Experience that provides guidance to sales reps as they work through the sales process. With Sales Path, businesses can create a customized sales process that aligns with their unique sales methodology and provides guidance to their sales reps at every stage of the sales process. In this blog, we will explore the Sales Path feature in Salesforce Lightning Experience and how it can help businesses improve their sales performance.

Sales Path is designed to help sales reps focus on the most important tasks at each stage of the sales process, providing them with clear guidance and helping them to stay on track. With Sales Path, businesses can customize the sales process to match their unique requirements, including adding stages, fields, and guidance messages.

Here are some of the benefits of using Sales Path in Salesforce Lightning Experience:

Improved Sales Performance: Sales Path provides sales reps with guidance on the next best action at each stage of the sales process, helping them to close more deals and improve their sales performance.

Customizable Sales Process: With Sales Path, businesses can customize the sales process to match their unique requirements, including adding stages, fields, and guidance messages.

Increased Visibility: Sales Path provides increased visibility into the sales pipeline, helping businesses to identify bottlenecks and take action to improve the sales process.

Enhanced Collaboration: Sales Path enables sales reps to collaborate more effectively with other team members, including managers and other sales reps, by providing a clear view of the sales process and the next best action.

Here’s how to set up Sales Path in Salesforce Lightning Experience:

Step 1: Define the Sales Process

The first step in setting up a Sales Path is to define the sales process. This involves identifying the stages of the sales process and the key actions that should be taken at each stage. Click on the Setup→ Sales Process to create a sales process.

Define the Sales Process

Step 2: Create Sales Path

Once the sales process has been defined, you can create a Sales Path in the Salesforce Lightning Experience. This involves adding stages, fields, and guidance messages to the sales process. To create a sales path Click on the Setup→ Path Settings to create a new sales path.

Create Sales Path

Step 2a : Name Your Path 

The next step is to name your path and select which object the path should be visible. Once you have selected the object, picklist and provided the name please click the ‘Next’ button,

Name Your Path

Step 2b: Select Fields and Text

The next step is to select fields that need to be visible on each stage and the guidance text for salespeople to help them key in the successful sale.

Select Fields and Text

Step 3: Activate Sales Path

The final step is to activate the sales path and encourage the sales users with some celebrations on their successful sale.

Once Sales Path has been created, you can assign it to specific users or groups of users in Salesforce. This ensures that sales reps have access to the guidance and support they need to close deals and improve their sales performance.

Step 3: Activate Sales Path

Step 4: Monitor and Optimize the Sales Process

Finally, it’s important to monitor and optimize the sales process to ensure that it is delivering the desired results. Use Salesforce reporting and analytics tools to track progress and identify areas for improvement.

Step 4: Monitor and Optimize the Sales Process

Conclusion

Sales Path is a powerful feature of Salesforce Lightning Experience that can help businesses to improve their sales performance. By providing guidance to sales reps at every stage of the sales process, Sales Path can help businesses to close more deals and increase revenue. To set up Sales Path in Salesforce Lightning Experience, define the sales process, create Sales Path, assign it to users, and monitor and optimize the sales process over time. With a Sales Path in place, businesses can improve their sales performance and achieve their revenue goals.

Categories
Blog

A Deep Dive into Generative Pre-trained Transformer

Introduction

GPT, or Generative Pre-trained Transformer, is a state-of-the-art model in the field of natural language processing (NLP). It is designed to understand and generate human-like text by leveraging the power of deep learning and neural networks. What makes GPT significant is its ability to learn from massive amounts of text data during a pre-training phase. By exposing itself to diverse language patterns, GPT learns grammar, semantics, and contextual understanding, making it proficient in generating coherent and contextually appropriate responses. Once pre-training is complete, GPT can be fine-tuned on specific tasks or domains, enabling it to excel in various NLP applications. For example, it can be used to improve Chabot’s, making conversations more engaging and lifelike. 

GPT can tell bad jokes and write accidentally hilarious poems about your life, but it can also help you do your job better. The catch: you need to help it do its job better, too.

Understanding the Basics of GPT

The architecture of GPT consists of a stack of identical encoder-decoder Transformer layers. The encoder processes the input text, while the decoder generates the output. However, unlike traditional encoder-decoder models, GPT is solely focused on the decoding process, making it particularly effective for generating text. One of the key components of GPT is the self-attention mechanism. This mechanism allows GPT to analyze the dependencies between different words within a given input sequence. By attending to different parts of the input, GPT can effectively capture the context and relationships between words, leading to more coherent and contextually appropriate text generation. The training process of GPT involves two main steps: pre-training and fine-tuning. During pre-training, GPT is exposed to a vast amount of text data, such as books, articles, or web pages. It learns to predict the next word in a sentence based on the context provided by the preceding words. This unsupervised learning approach helps GPT to grasp grammar, semantics, and even gain a general understanding of the world.
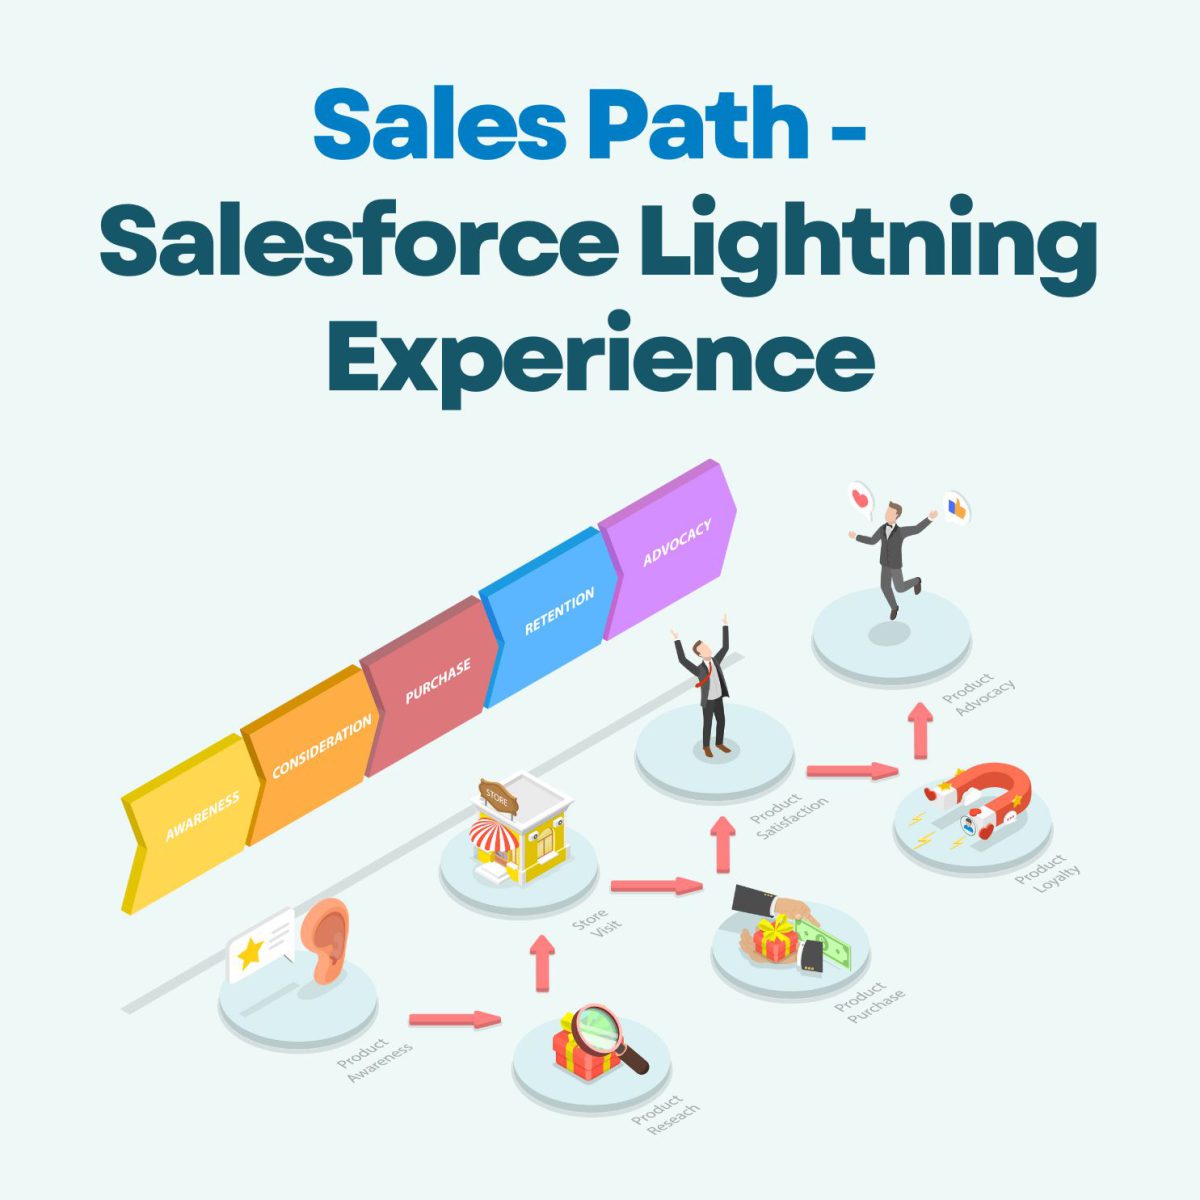
Sales GPT:

Salesforce Sales GPT is designed to help sales teams create more personalized and engaging content. It can be used to generate content that is tailored to specific customers or audiences, and it can also be used to create content that is relevant to the latest trends and news.

Sales GPT offers the following features:

Sales Assistant: The tool summarizes every step of the sales cycle in a side panel, from account research and meeting preparation to drafting contract clauses. It also automatically keeps the CRM up-to-date, so you can be sure that your sales data is always accurate and up-to-date.

Sales Emails: The tool can automatically generate personalized emails for every customer interaction, using data from your CRM system. This means that you can send emails that are tailored to the specific needs and interests of your customers.

Call Summaries: The tool automatically transcribes and summarizes calls, and then sets follow-up actions based on the transcription. This can help to improve seller productivity by freeing up time that would otherwise be spent manually transcribing calls and setting follow-up actions.

Service GPT

Salesforce Service GPT is a generative AI tool that can be used to improve customer service and field service operations. It can help to improve customer satisfaction, reduce costs, increase productivity, and make better decisions.

Service GPT offers the following features:

Service Replies: The tool can automatically generate personalized responses based on real-time data sources, such as your CRM data and other sources. This means that you can send responses that are tailored to the specific needs and interests of your customers.

Work Summaries: Create concise and informative summaries of service cases and customer engagements based on the details of the case and the customer’s history.

Call Summaries: The tool automatically transcribes and summarizes calls, and then sets follow-up actions based on the transcription. This can help to improve seller productivity by freeing up time that would otherwise be spent manually transcribing calls and setting follow-up actions.

Knowledge Articles: The tool can automatically generate and update articles based on the latest real-time data from support interactions. This means that the articles are always up-to-date with the latest information and best practices.

Mobile Work Briefings: The tool summarizes critical information about each appointment before field service teams arrive, helping them to work more efficiently. This information includes the customer’s contact information, the issue that needs to be resolved, and any relevant history.

Engagement: Salesforce Service GPT can be used to generate content that is relevant to the latest trends and news. This can help to keep customers engaged and coming back for more.

Marketing GPT

With Marketing GPT, Salesforce aims to give marketers an AI-connected user interface that augments campaign brief conception, audience/segment discovery, and content creation. 

Marketing GPT offers the following features:

Segment Creation: Marketers are given the ability to create audience segments quickly and improve targeting using natural language prompts to query Data Cloud, Salesforce’s CDP offering.

Email Content Creation: This gives marketers the ability to build email body content, create subject lines, and more, automagically.

Segment Intelligence: Segment Intelligence steps in to help marketers understand campaign performance, relative to an audience segment. 

Slack GPT

Slack is a cloud-based communication platform that helps teams to collaborate more effectively. It provides a centralized space where teams can communicate in real time, share files, and collaborate on projects. Slack can also be integrated with other tools and services, which allows teams to streamline their workflows and work more efficiently.

Tableau GPT

Tableau is a data visualization and business intelligence software that allows users to connect to various data sources, create interactive dashboards, and generate insightful reports. It helps users analyze, understand, and communicate data in a visual and interactive format.

Tableau is a powerful tool that can be used by businesses of all sizes. It is easy to use and does not require any coding knowledge. Tableau can be used to connect to a wide range of data sources, including databases, spreadsheets, and cloud services.

Tableau GPT is a new feature that is being added to Tableau. It uses generative AI to automate many of the tasks involved in data analysis. This makes it easier for users to analyze data and create visualizations.

Tableau GPT is still under development, but it has the potential to revolutionize the way data is analyzed. It could make data analysis more accessible to a wider range of users and help businesses make better decisions based on data.

Apex GPT

Apex GPT is a generative AI tool that helps developers and IT teams to improve software development speed and efficiency. It can be used to generate intelligent Apex or LWC code through natural language prompts, which can help to speed up the development process.

Apex GPT also has the ability to scan for code vulnerabilities and provide inline code suggestions directly from the Salesforce integrated development environment (IDE). This can help to improve the quality of code and reduce the risk of errors.

Overall, Apex GPT is a powerful tool that can help developers to improve their productivity and the quality of their code.

Flow GPT

Flow GPT is a generative AI tool that allows users to create workflows based on a single text prompt. This means that users can simply type a natural language description of what they want the workflow to do, and Flow GPT will generate the code for the workflow.

For example, a user could type “I want to create a workflow that sends a notification to sales representatives when a lead is converted to an opportunity.” Flow GPT would then generate the code for a workflow that does exactly that.

Flow GPT is a powerful tool that can help users to automate their workflows and save time. It is also a great way for users who are not familiar with programming to create workflows.

Pricing

The pricing of Sales GPT & Service GPT were announced a few weeks ago, and will be rolled into the existing Sales & Service Cloud Einstein Licenses, priced at $50/user per month. However, if you have Unlimited Edition licenses, Sales & Service GPT will be included. 

This includes a limited number of Einstein GPT credits (number TBC), which go towards generating outputs from user prompts. Currently, it’s not confirmed what constitutes one credit. Other large language models (LLMs) work on the basis of tokens, which determine the scope of information that the model can analyze when generating outputs. 

Salesforce is releasing Enterprise Expansion Packs to democratize pricing for generative AI. Currently, Salesforce has to absorb the cost of processing data when using their LLM (i.e. Einstein GPT), which can be expensive. To make pricing more fair, Salesforce is offering a pay-as-you-go option for customers who exceed their allotted credits.

Enterprise Expansion Packs for Sales and Service teams provide additional credits for querying large databases. This means that teams can use more generative AI without having to worry about exceeding their allotted credits.

Summary

It’s safe to say that Einstein GPT has some extraordinary expectations to live up to, but Salesforce have already demonstrated how this AI technology endeavors to be safe and secure without limiting its capabilities.It’ll be exciting to see its use cases once we begin using it in full force.

REF: https://www.salesforce.com/news/press-releases/2023/03/07/einstein-generative-ai/

Categories
Blog

Demystifying Exchange Rate Management in Salesforce

Introduction: Managing global sales involves more than just products and leads; it also requires keeping a close eye on currency exchange rates. In Salesforce, understanding and effectively utilizing exchange rates can significantly impact your sales strategies, revenue calculations, and financial planning. This blog will guide you through the essentials of exchange rate management in Salesforce, helping you navigate the complexities of international sales with confidence.

Understanding Exchange Rates: Exchange rates determine the value of one currency relative to another. They fluctuate based on economic factors and impact the conversion of one currency to another during transactions. In Salesforce, exchange rates are crucial when dealing with multi-currency records.

Why Exchange Rates Matter in Salesforce:

  • Accurate Financial Reporting: Exchange rates influence the conversion of foreign currency amounts into your organization’s base currency. This ensures accurate financial reporting, revenue recognition, and forecasting.
  • Sales and Opportunity Management: Deals involving different currencies require conversion for proper revenue calculation. Accurate exchange rates enable your sales team to understand the true value of deals and opportunities.
  • Global Insights: Exchange rates can reveal market trends and the relative performance of products in different regions. This insight aids in making informed decisions about international expansion and targeting.

Exchange Rate Setup: Salesforce provides tools to manage exchange rates effectively:

  • Multi-Currency Activation: Enable multi-currency in your Salesforce org if you haven’t already. This allows you to handle transactions in multiple currencies.
  • Advanced Currency Management: For sophisticated needs, consider activating Advanced Currency Management. This feature helps you maintain historical exchange rates, preventing discrepancies in reporting.

Maintaining Exchange Rates:

  • Automatic Updates: Salesforce can fetch daily exchange rates from external sources like currency exchange rate providers. Set up scheduled jobs to keep your rates up-to-date automatically.
  • Manual Entry: You can manually input exchange rates if needed, especially if you have unique sources or requirements.

Using Exchange Rates:

  • Opportunity Conversion: When creating or updating opportunities involving foreign currencies, Salesforce converts the amounts into your base currency using the relevant exchange rate.
  • Reports and Dashboards: Leverage Salesforce’s reporting capabilities to analyze sales performance across different currencies. Create reports that show revenue in both local and base currencies for a comprehensive view.
  • Currency Fields: Salesforce provides standard and custom fields for currency values. These fields automatically handle currency conversion based on exchange rates.

Best Practices:

  • Regular Updates: Ensure your exchange rates are regularly updated to reflect the current market conditions.
  • Clear Documentation: Maintain clear records of exchange rates used for each transaction. This is essential for transparency and audit purposes.
  • Educate Your Team: Train your sales and finance teams on how exchange rates impact deals and reporting. This ensures accurate data entry and understanding.

Conclusion: In the global business landscape, exchange rates play a pivotal role in accurate financial reporting, sales management, and decision-making. Salesforce’s exchange rate management features empower you to navigate multi-currency transactions effectively. You can effectively manage your international sales operations and gain insightful information about your overall business performance by setting up, maintaining, and using exchange rates in the right way.

Categories
Blog

DevOps Salesforce Guide Beginners

Introduction

       Salesforce is set to offer a new feature called DevOps,designed to streamline project deployments.DevOps Salesforce is a comprehensive approach that combines the principles of Development (Dev) and Operations (Ops) to streamline and enhance the process of software development and deployment within the Salesforce ecosystem. It aims to bridge the gaps between developers, administrators, and operations teams, enabling them to collaborate more effectively, accelerate project deliveries, and ensure a smooth and reliable software release cycle.

Steps

1. Enable DevOps

As always enabling a feature in salesforce is easy. Just click Setup→DevOps Center and Click Enable. Screenshot below,

2. Install the package

Click on the ‘Install Package’ button in the below screenshot to install the app in the salesforce org.

After you install the package, be sure to complete the configuration steps in Salesforce Help.

3. Create Connected App

The connected app provides access to DevOps Center in the App Launcher. The app appears in App Launcher after users are assigned the appropriate DevOps Center permission sets.

  1. From Setup, enter App Manager in the Quick Find box, then select App Manager.
  2. Click New Connected App.
  3. In Basic Information:
    • Connected App Name: DevOps Center
    • API Name: DevOps_Center
    • Contact Email: [email protected]
    • Logo Image URL: https://tinyurl.com/doc-icon
    • Description: Manage your development and release processes
  4. In Web App Settings, enter the Start URL: /sf_devops/DevOpsCenter.app
  5. Click Save.

6. In Manage Connected Apps, click Manage.

7. In the Permissions Sets section, click Manage Permission Sets.

8. Select sf_devops_NamedCredentials, then click Save.

4. Access DevOps

Click on the App Launcher and Select DevOpsCenter which will re-direct you to the DevOpsCenter.

5. Create a Project

Click on the ‘New Project’ button to create a new project.

6. Connect Environment

Click the ‘Add Development Environment’ button to connect the sandbox which should be a sandbox. The Dev Ops do not support Developer Edition so please make sure to create a sandbox and then connect it.

Click on the ‘Connect Environment’ button to connect the production environment. You can have a number of environments like Dev, UAT & QA sandbox and then finally deploy them to production.

7. Create Work Items

Click on the tab Work Items →‘New Work Item’ to create a work item and assign it with a ower. As an example I created an work item called create a checkbox called ‘Paid’.Once you have created the checkbox in the source system you can then pull that metadata into this work item by adding the component manually.

Once the component is added to the Work Item change the Status to In Review and once the Work Item is approved the field is ready to promote.

8. Promote the changes

Click on the Pipeline and then select the Approved Work Item which can be deployed into production and click the ‘Promote Selected’ button to push the changes into production.

9. Complete Overview Work Item

Once the changes are pushed into production we can have a complete overview of the work item by clicking on the work item. Please see the screenshot below,

Conclusion:

In conclusion, embracing DevOps practices within the Salesforce ecosystem is crucial for organizations looking to optimize their software development and deployment processes. DevOps Salesforce offers a comprehensive approach that promotes collaboration, automation, and continuous improvement, enabling teams to deliver high-quality solutions faster and more efficiently.

By implementing DevOps Salesforce, organizations can achieve faster time to market, increased agility, improved software quality, and enhanced customer experiences. The integration of version control systems, automated testing frameworks, and CI/CD pipelines ensures a smooth and reliable process from development to production. Additionally, Salesforce provides tools and APIs that support DevOps practices, enabling organizations to effectively manage complex projects, streamline workflows, and deliver innovative solutions.

Categories
Blog

Mastering Salesforce Pipeline Inspection

Introduction:

Pipeline inspection is a vital practice for sales teams to assess the health and effectiveness of their sales pipelines. By regularly reviewing and analyzing opportunities at each stage, sales professionals can identify potential roadblocks, optimize their sales strategies, and increase the likelihood of closing deals successfully. In this blog post, we will delve into the significance of pipeline inspection and provide a step-by-step guide on setting up a comprehensive inspection process in Salesforce.

1. The importance of Pipeline Inspection:

Pipeline inspection allows sales teams to gain valuable insights into their sales pipelines and make informed decisions to improve performance. It helps in:

  • Identifying bottlenecks or stalled deals that require attention.
  • Improving forecasting accuracy and revenue projections.
  • Assessing the quality of opportunities and ensuring alignment with defined criteria.
  • Facilitating collaboration between sales reps and sales leaders for pipeline optimization.
  • Optimizing resource allocation and prioritizing high-value opportunities.

2. Setting up Pipeline Inspection in Salesforce:

Follow these steps to establish Pipeline Inspection in Salesforce:

  1. From Setup, in the Quick Find box, enter Pipeline Inspection, and then select Pipeline Inspection Setup.
  2. Turn on Pipeline Inspection.
  3. Verify that historical trending is enabled and configured for opportunities. The fields required for Pipeline Inspection features are trended by default, including the Next Step field.
  1. Add the Pipeline Inspection button to the Opportunity tab.
  1. You can see the button in the opportunity page.

6. Assign the Pipeline Inspection permission access to users.

3. The process of Sales Pipeline Inspection:

a. Define Inspection Criteria:

Collaborate with sales leadership to establish clear and measurable criteria for pipeline inspection. Determine the factors that indicate a healthy opportunity at each stage, such as engagement level, decision-maker involvement, budget alignment, and next steps. Ensure these criteria align with your overall sales strategy and goals.

b. Customize Opportunity Fields:

Tailor the opportunity object in Salesforce to include relevant fields that capture the necessary data for pipeline inspection. Consider adding fields for key metrics such as deal stage, close date, probability, expected revenue, competition, and notes. These fields will assist in evaluating opportunities based on the defined inspection criteria.

c. Implement Validation Rules:

Set up validation rules in Salesforce to enforce data accuracy and consistency. For example, you can establish rules that require specific fields to be completed before progressing to the next stage. This ensures that opportunities are properly qualified and tracked throughout the sales process.

d. Utilize Reports and Dashboards:

Leverage Salesforce’s reporting and dashboard features to create visualizations that provide a comprehensive view of your pipeline. Develop reports that display key metrics like win rates, conversion rates, average deal size, and stage progression. Build interactive dashboards that enable real-time monitoring and facilitate drill-down analysis.

e. Schedule Regular Pipeline Reviews:

Establish a consistent cadence for pipeline reviews, whether on a weekly or bi-weekly basis. Gather sales team members and sales leadership to review opportunities, discuss challenges, and collaborate on strategies to move deals forward. Encourage open dialogue, share best practices, and provide coaching to enhance pipeline management skills.

f. Integrate Sales Tools and Automation:

Integrate additional sales tools and automation with Salesforce to streamline the pipeline inspection process. For instance, implement sales engagement platforms that track prospect interactions, automate follow-ups, and provide engagement analytics. Integrate with AI-powered tools that offer predictive insights to prioritize high-value opportunities.

4. Continuous Refinement and Improvement:

Pipeline inspection is an iterative process that requires continuous refinement and improvement. Regularly assess the effectiveness of your inspection criteria, validation rules, and reporting metrics. Solicit feedback from your sales team and sales leadership to identify areas of enhancement. Stay agile and adapt your process to align with evolving market dynamics and customer needs.

Conclusion:

Setting up a comprehensive pipeline inspection process in Salesforce empowers sales teams to gain insights into their sales pipelines, optimize their strategies, and achieve better sales results. By defining inspection criteria, customizing opportunity fields, implementing validation rules, utilizing reports and dashboards, scheduling regular reviews, and integrating sales tools, you can streamline your pipeline inspection process and drive continuous improvement. Leverage Salesforce’s robust CRM capabilities to establish a proactive approach to pipeline management and elevate your sales performance.

Categories
Blog

Crafting an Ideal User Experience: Utilizing Login Flows for Salesforce Community Registration

Categories
Blog

Revenue Grid for Salesforce

Introduction:

As a business, it’s essential to have a clear understanding of your revenue streams. A revenue grid is a useful tool that helps you track your revenue and analyze your business performance. Integrating your revenue grid to Salesforce can help you streamline your revenue management process and get a comprehensive view of your sales pipeline. In this blog, we’ll discuss the benefits of integrating a revenue grid to Salesforce and the steps to do so.

Benefits of integrating a revenue grid to Salesforce using a Gmail plugin:

Easy access to revenue data: Integrating your revenue grid to Salesforce using a Gmail plugin allows you to access your revenue data directly from your Gmail inbox. You can view your revenue data alongside your emails and get a better understanding of your business performance.

Streamlined revenue management process: With a revenue grid integrated to Salesforce using a Gmail plugin, you can automate your revenue management process. You can set up workflows that automatically update your revenue data and create reports based on your revenue metrics.

Improved forecasting: Integrating your revenue grid to Salesforce using a Gmail plugin can help you improve your forecasting accuracy. You can use historical data to predict future revenue and make data-driven decisions.

Comprehensive sales pipeline view: By integrating your revenue grid to Salesforce using a Gmail plugin, you can get a comprehensive view of your sales pipeline. You can view your revenue data alongside your sales data and get a better understanding of your sales performance.

Steps to integrate a revenue grid to Salesforce using a Gmail plugin:

Install the Revenue Grid plugin for Gmail: Go to the Google Workspace Marketplace and search for “Revenue Grid” Click on the “Install” button to add the plugin to your Gmail account.

Connect your Gmail account: After installing the plugin, open an email in Gmail and click on the Revenue Grid icon located on the right side of the email.

Connect your Salesforce account: After connecting the Gamil then need to connect salesforce. In the Revenue Grid sidebar that appears, click on the “Salesforce” tab and select “Connect to Salesforce.” Follow the prompts to log in to your Salesforce account and grant permissions to Revenue Grid.

Enable Salesforce Sync: Once you’ve connected your Salesforce account, you can enable Salesforce Sync to automatically sync your emails and calendar events to Salesforce. To do this, click on the “Settings” tab in the Revenue Grid sidebar, select “Sync,” and toggle on “Salesforce Sync.”

Use the plugin features: With the plugin installed and Salesforce connected, you can now use features such as Email Tracking, Email Templates, and Calendar Sync to streamline your sales workflow and keep track of your interactions with prospects and customers.

By following these steps, you can use the Revenue Grid plugin for Gmail to connect with Salesforce and improve your sales productivity

Conclusion:

Integrating your revenue grid to Salesforce using a Gmail plugin can help you streamline your revenue management process and get a comprehensive view of your sales pipeline. By following the steps outlined in this blog, you can set up an integration that automates your revenue tracking and helps you make data-driven decisions. Choose a revenue grid that has a Gmail plugin available and start integrating your revenue grid to Salesforce today.

Categories
Blog

Xero Integration With Salesforce Using Breadwinner

Introduction:

Small businesses require efficient financial management, but it can be challenging to keep bookkeeping up to date. Fortunately, there are several accounting software solutions available, and Xero is a reliable option which is simple and inexpensive. Founded in Wellington in 2006 by Rod Drury and Hamish Edwards, Xero is a cloud-based accounting software that caters to small businesses. Combining Xero with Salesforce, a customer relationship management (CRM) platform, can enhance accounting and customer management processes. By syncing our financial data and customer information between these two platforms, we can save time, reduce errors, and gain insight into our business operations.

Xero allows you to manage your finances, including invoicing, expenses, and inventory, from anywhere and at any time. Salesforce helps you manage your sales, marketing, and customer service activities. By integrating Xero with Salesforce, we can bring these two systems together to complement our business operations.

Integrating Xero with Salesforce offers several benefits, including streamlining accounting processes by automating invoicing, payment recording, and account reconciliation. This eliminates the need for manual data entry, reducing the risk of errors. We can also gain insights into our financial data in Salesforce, making it easier to track revenue, expenses, and cash flow.

Here are some steps to get started:

Assess our integration needs

Before we begin integrating Xero with Salesforce, we should evaluate our integration needs and goals. This will help us determine which integration method is best for our business.

Choose an integration method

There are several third-party integration tools available that can help you integrate Xero with Salesforce, such as Zapier, Workato, and Breadwinner. You can also build a custom integration using Xero and Salesforce APIs.

Set up the integration

Once we have chosen an integration method, we will need to set up the integration. This may involve configuring the integration tool, mapping fields between Xero and Salesforce, and setting up any custom workflows or triggers.

Test and refine the integration

After we have set up the integration, we should test it thoroughly to ensure that it is working as expected. We may need to refine the integration based on our testing results and feedback from our team.

How we integrate Xero with Salesforce:

Despite all the integration options, our preferred partner is “Breadwinner”. It provides a comprehensive solution for managing financial data and accounting processes within Salesforce.

The first step to integrating Xero with Salesforce using Breadwinner is to install the Breadwinner app in your Salesforce org. You can find Breadwinner on the Salesforce AppExchange and follow the installation instructions provided.

Once you’ve installed Breadwinner, the next step is to connect your accounting system to Salesforce. Breadwinner currently supports QuickBooks, Xero, and NetSuite. After selecting your accounting system, you’ll need to enter your login credentials and authorize the connection.

Breadwinner can be installed and configured in minutes, with no mapping required! We have dedicated objects in Salesforce that perfectly represents a corresponding Xero object. 

Then you’ll need to configure your sync preferences. This will allow you to choose which data to sync between Salesforce and your accounting system. You can do this by navigating to the Breadwinner tab in Salesforce and selecting “Sync Settings”.

Once you’ve configured your sync preferences, you can start syncing data between Salesforce and your accounting system. This can be done manually or set up on a schedule. Breadwinner provides real-time financial insights and streamlined accounting processes, helping you to make data-driven decisions and save time on manual tasks.

Finally, we have integrated Xero and Salesforce using Breadwinner.

Here are some benefits of integrating Xero with Salesforce:

Streamline our accounting processes

We can automatically create invoices, record payments, and reconcile accounts in Xero based on data from Salesforce. This eliminates the need for manual data entry and reduces the risk of errors. We can also view our financial data in Salesforce, making it easier to track our revenue, expenses, and cash flow.

Improve our customer management

Integrating Xero with Salesforce allows us to keep our customer data up to date and accurate in both systems. We can create new customers in Salesforce and have them automatically added to Xero. We can also view a customer’s financial history in Salesforce, such as their outstanding balances and payment history, which can help us provide better customer service.

Gain valuable insight

We can gain insights into our business operations that would be difficult to obtain otherwise. For example, we can analyze our sales data in Salesforce and compare it to our financial data in Xero to identify trends and opportunities. We can also use custom reports and dashboards to track our key performance indicators (KPIs) and make data-driven decisions.

Pricing for Xero:

The pricing of Xero may vary depending on the country and currency. Here are the current pricing plans for Xero:

EditionUK PriceUS PriceAustralia Price
Starter£10 per month$11 per monthAUD $13.50 per month
Standard£24 per month$32 per monthAUD $27 per month
Premium£30 per month$62 per monthAUD $47 per monthPremium 2 – AUD $62 per month

Pricing for Breadwinner:

Breadwinner offers a range of pricing plans for their Salesforce-Xero integration software, depending on the number of users and the features required. Here are the current pricing plans for Breadwinner:

EditionPrice
Starter $99 per month for up to 3 users, with basic sync and automation features
Professional$249 per month for up to 10 users, with additional features such as mapping and customization options
Enterprise$249 per month for up to 10 users, with additional features such as mapping and customization options

It’s important to note that the pricing for Breadwinner and Xero are in addition to the pricing for Salesforce, which are separate platforms with their own pricing plans. Additionally, Breadwinner and Xero offers a free trial period so that you can test out the software and see if it meets your business needs before committing to a paid plan.

In conclusion, integrating Xero with Salesforce is an excellent way to enhance accounting and customer management processes, streamline operations, and gain valuable insights into business operations. By automating tasks and syncing data between these two platforms, you can save time, reduce errors, and improve your overall business performance.