Sweet Potato

Categories
Blog

Salesforce Health Cloud: The Future of Healthcare

Introduction

Salesforce is a leading provider of cloud-based software solutions that are used by businesses of all sizes and across all industries. Salesforce’s platform provides organizations with a range of tools to manage their customer relationships, automate their sales and marketing processes, and streamline their operations. One of Salesforce’s most exciting offerings is its Health Cloud platform, which is designed specifically for healthcare providers.

Salesforce Health Cloud is a cloud-based platform that enables healthcare providers to have a complete view of the patient, including their medical history, diagnoses, medications, and treatments. By leveraging the power of Salesforce, Health Cloud helps providers deliver personalized care that is both proactive and preventative.

In this blog, we’ll take a closer look at what Salesforce Health Cloud is, how it works, and what it can do for healthcare providers.

What is Salesforce Health Cloud?

Salesforce Health Cloud is a healthcare-specific version of the Salesforce CRM (Customer Relationship Management) platform. It provides healthcare providers with a single, unified view of the patient, allowing them to better manage patient relationships and deliver personalized care.

Health Cloud is built on the Salesforce Lightning platform, which means it is highly customizable and scalable. It can be easily configured to meet the unique needs of healthcare providers and can be integrated with other healthcare systems, such as Electronic Health Records (EHRs).
How does Salesforce Health Cloud work?

Salesforce Health Cloud works by bringing together data from a variety of sources, including EHRs, medical devices, wearables, and other healthcare systems. This data is then organized into a unified patient profile, which can be accessed by healthcare providers from any device or location.

Health Cloud also includes a number of powerful tools that help healthcare providers deliver personalized care. For example, it includes a care coordination tool that allows providers to collaborate with each other and with patients in real time. It also includes a patient engagement tool that enables providers to communicate with patients through their preferred channels, such as email, text, or social media.

What can Salesforce Health Cloud do for healthcare providers?

Salesforce Health Cloud can help healthcare providers in a number of ways, including:
Improving patient outcomes: By providing a complete view of the patient, Health Cloud enables providers to deliver more personalized care that is tailored to the individual’s unique needs.

Increasing patient engagement: Health Cloud’s patient engagement tool enables providers to communicate with patients through their preferred channels, which can help improve patient satisfaction and loyalty.

Streamlining care coordination: Health Cloud’s care coordination tool allows providers to collaborate with each other and with patients in real time, which can help reduce errors and improve care quality.

Enhancing operational efficiency: Health Cloud’s powerful analytics tools provide healthcare providers with insights into their operations, which can help them identify areas for improvement and optimize their workflows.
Conclusion

Salesforce Health Cloud is a powerful platform that has the potential to transform healthcare delivery. By bringing together data from a variety of sources and providing healthcare providers with a complete view of the patient, it enables them to deliver personalized, proactive, and preventative care that can improve patient outcomes and increase patient engagement.

Whether you are in the healthcare industry or another industry altogether, Salesforce can help you optimize your operations, streamline your workflows, and deliver better customer experiences. Contact us today to learn more about how their solutions can help your organization.

Categories
Blog

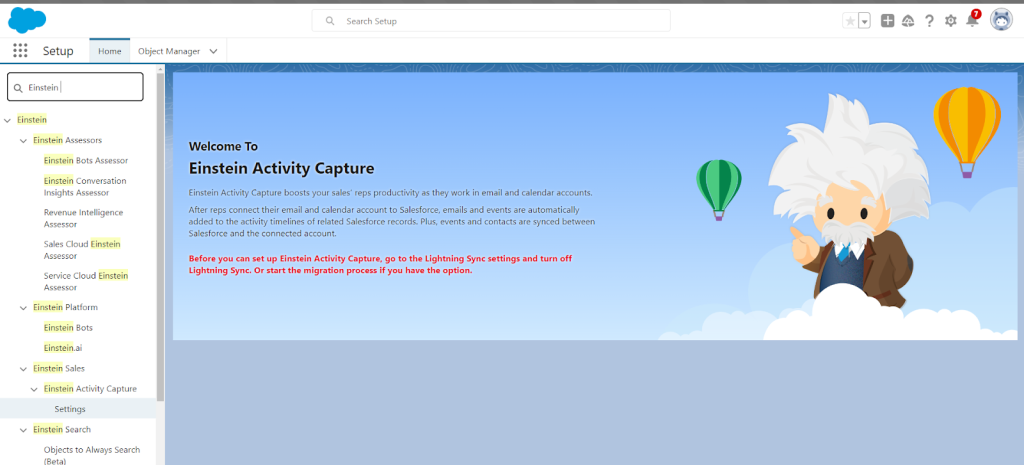
Einstein Activity Capture

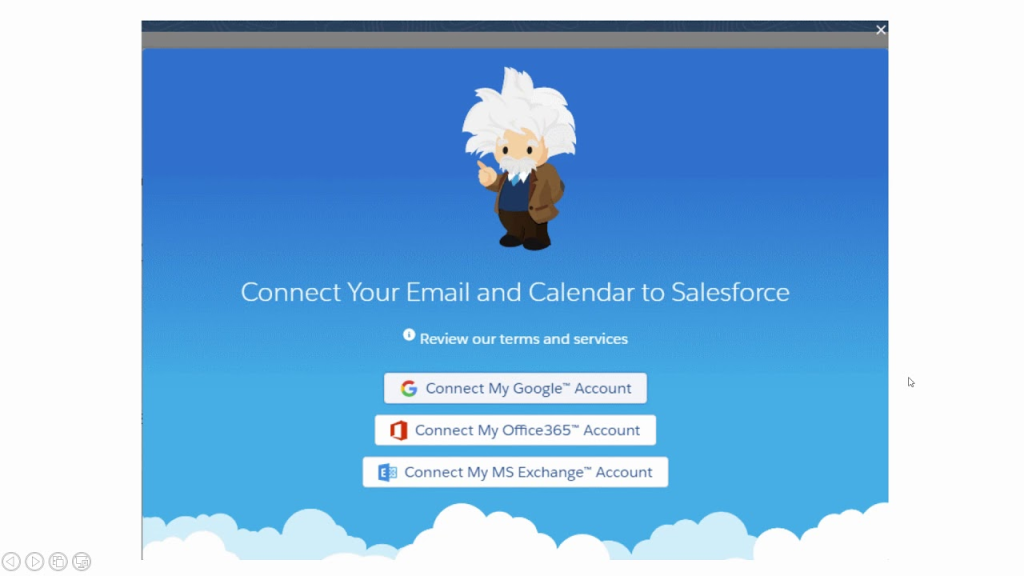
Salesforce Einstein Activity Capture is a powerful tool that allows you to automatically capture customer interactions, such as emails, meetings, and calls, and store them directly within Salesforce. This functionality enables you to have a 360-degree view of your customers, improving collaboration between teams and enhancing the customer experience.

Einstein Activity Capture uses machine learning algorithms to analyze customer interactions and automatically associates them with the appropriate records in Salesforce. This technology can save your team valuable time and effort, as they no longer have to manually log every interaction with a customer.In this blog, we will explore the key benefits of Salesforce Einstein Activity Capture.

Using Einstein Activity Capture to Boost Your Sales Productivity:

Einstein Activity Capture is a tool that can enhance your sales productivity by capturing and storing data regarding your sales activities in Salesforce.This tool offers valuable insights into how you and your team are utilizing your time, enabling you to recognize areas for improvement and take action to streamline your sales processes.

Here are some ways that you can use Einstein Activity Capture to boost your sales productivity:

Automate Data Entry

One of the major advantages of using Einstein Activity Capture is that it automates the process of data entry into Salesforce.Einstein Activity Capture saves you time and eliminates the need for manual data entry by capturing data from your email, calendar, and other sources.This allows you to concentrate on selling, rather than on administrative tasks.

For Example, Let’s say you work in sales and have a meeting scheduled with a potential customer. You have already added the meeting to your calendar and synced it with Salesforce. With Einstein Activity Capture, when you attend the meeting, the software will automatically capture the meeting details, including the date and time, location, attendees, and any notes you take during the meeting.

Once the meeting is over, Einstein Activity Capture can automatically create a new task or opportunity in Salesforce based on the details of the meeting. For example, if the potential customer expressed interest in a particular product or service, Einstein Activity Capture can create a new opportunity in Salesforce and associate it with the customer’s account.

This automated data entry can save you time and reduce the risk of human error, as you don’t have to manually enter the meeting details or create new tasks or opportunities in Salesforce. Instead, the software does it for you, freeing you up to focus on other tasks and activities.

Track Sales Activities

Einstein Activity Capture empowers you to track a broad range of sales activities, such as emails, meetings, calls, and tasks. By monitoring these activities, you can acquire insights into the amount of time you and your team are devoting to each activity and recognize areas for improvement.For instance, if you discover that your team is allocating excessive time to administrative tasks, you can implement measures to simplify those processes and liberate more time for selling

Analyze Sales Performance

Einstein Activity Capture provides you with powerful analytics tools that enable you to analyze your sales performance in detail. You can access reports and dashboards that display how much time you and your team are dedicating to various activities, the number of meetings and calls you are conducting, and the number of deals you are closing.

Additionally, Einstein Activity Capture can help you identify patterns and trends in your sales data. For example, you can see which salespeople are performing well and which ones may need additional coaching or training. You can also identify which products or services are selling the best and which ones may need to be promoted more effectively.

Collaborate More Effectively

Einstein Activity Capture also allows you to collaborate more efficiently with your team members. By capturing data regarding your sales activities, you can share that information with other team members and collaborate more efficiently.For instance, if one of your team members is handling a deal, you can review their activity data to comprehend their progress better and offer assistance as required.

Conclusion

Einstein Activity Capture is a potent tool that can increase your sales productivity by automating data entry, monitoring sales activities, analyzing sales performance, and collaborating more effectively with your team members. By leveraging this tool, you can acquire valuable insights into your sales processes and take action to simplify your workflows and enhance your sales productivity.

If you want to learn more about Salesforce Einstein Activity Capture and how it can benefit your organization, feel free to contact us. Our team of Salesforce Experts would be happy to answer any questions you may have and provide guidance on how to implement this powerful tool.

Categories
Blog

Bye-bye Salesforce Struggles: How In-App Guidance Can Save the Day!!

Imagine this: You’re a new hire at a company that uses Salesforce to manage its sales and marketing operations. You’re excited to dive in and start contributing to the team, but as you open Salesforce, you’re greeted with a complex, overwhelming interface that you’re not sure how to navigate. You feel lost and frustrated, unsure of where to begin.

This is where In-App Guidance comes in. With In-App Guidance, you can receive personalized, contextual guidance that walks you through each step of your tasks and helps you learn new features, all while you work within Salesforce. No more switching back and forth between training materials and Salesforce. It’s like having a personal guide that shows you the way. In this story, In-App Guidance is the hero that saves the day for our new hire, helping them feel confident and productive from day one.

What is In-App Guidance?

The In-App Guidance feature in Salesforce empowers users to create bespoke prompts, walkthroughs, and tips within the platform’s user interface. These instructional elements take the form of pop-up windows that may include images, links, and textual guidance, providing a structured, step-by-step approach to completing specific tasks or workflows. By leveraging the In-App Guidance feature, users receive comprehensive support, improving their proficiency in navigating new features and executing tasks efficiently.

How to Create In-App Guidance in Salesforce?

Generating In-App Guidance in Salesforce is a user-friendly process that can be quickly completed. Below are the key steps to keep in mind:

Step 1: 

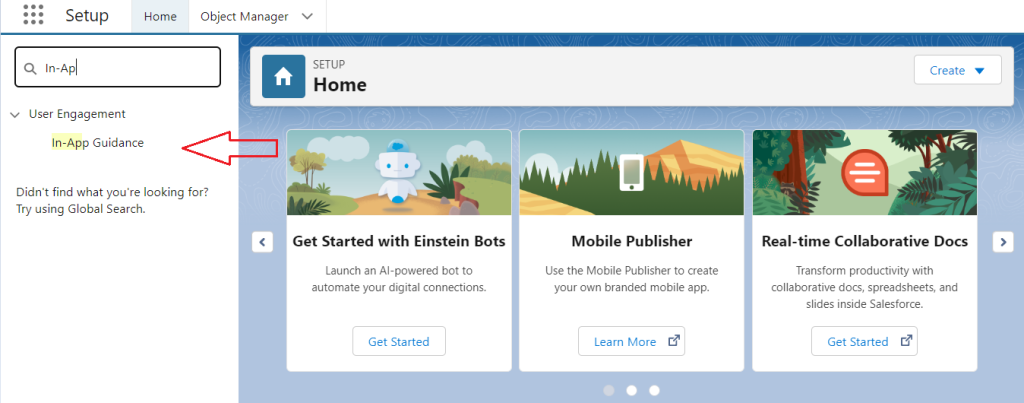
Navigate to the In-App Guidance Setup page in Salesforce. This can be accessed by going to Setup > User Engagement > In-App Guidance.

Step 2: 

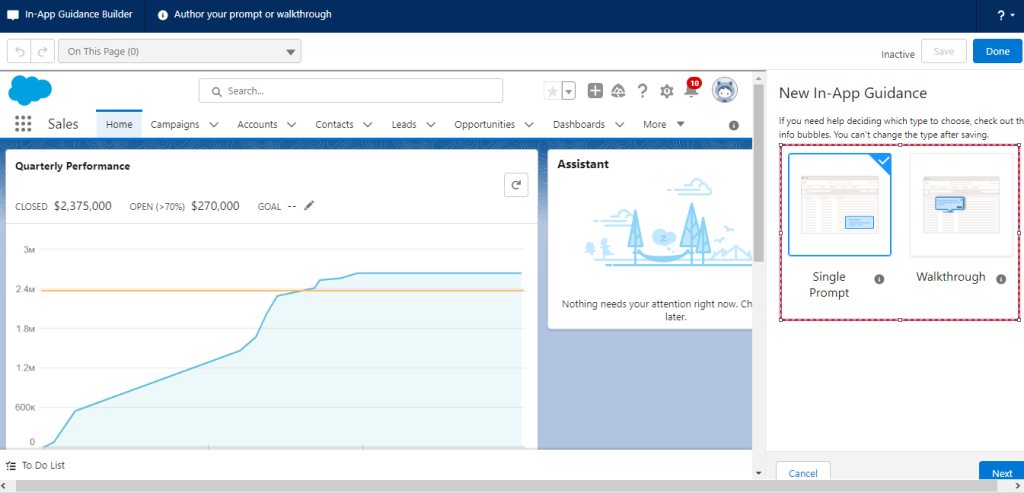
To create a new prompt or walkthrough, begin by clicking on the “Add” button. On the subsequent page, choose the type of prompt you wish to create and click the ‘Next’ button.

Step 3:

Choose the prompt type that defines how it should be displayed to users on page load and the application on which it should be active, such as the sales app.

Step 4:

In the “Content” section, you can create your guidance using a combination of text, images, and videos. Design your prompt or walkthrough using the In-App Guidance editor.

Step 5:

After clicking the save button, it will direct to In-App Guidance settings. Fill the Action Button Label and Action Button URL.

Step 6:

Select the desired schedule and frequency for your prompt or walkthrough, such as when a user logs in for the first time or navigates to a specific page.

Step 7:

In the “Target Audience” section, select the profiles or permission sets that should see this guidance. Choose the audience for your prompt or walkthrough.

Step 8: 

Save and activate your prompt or walkthrough. Once you have completed all of the necessary steps, save your prompt or walkthrough and activate it to make it visible to your target audience.

Discover the Magic of In-App Guidance in Salesforce

In-App Guidance can offer a range of benefits to users and organizations using Salesforce, including:

Improved User Productivity – In-App Guidance provides users with step-by-step instructions to complete tasks, making it faster and more efficient for users to navigate and use the Salesforce platform.

Reduced Training Costs – In-App Guidance can be used as a training tool for new users or for users who need additional assistance with specific tasks, reducing the need for formal training programs and associated costs.

Increased User Adoption – In-App Guidance can help users feel more comfortable and confident in using Salesforce, leading to increased adoption rates and better utilization of the platform.

To wrap things up.

 Salesforce’s In-App Guidance feature is a valuable tool that offers tailored prompts, guided walkthroughs, and helpful tips to assist users in completing specific tasks or workflows. By following the instructions provided earlier, you can easily create your own In-App Guidance in Salesforce, resulting in greater user productivity, minimized training expenses, and heightened adoption of the platform.

Categories
Blog

Restrict Users From Switching Lightning To Classic In Salesforce

One of the features that Salesforce offers is the ability for users to switch between the classic and lightning versions of the platform. However, there may be sometimes when you want to restrict users from switching to the classic version for various reasons. In this blog, we will explore why you may want to restrict users from switching salesforce lightning to classic and how you can do it.

Why Restrict Users from Switching to Classic Salesforce?

There are several reasons why you may want to restrict users from switching to classic.

Here are a few of them:

Security Concerns: The classic version of Salesforce is an older version that may not have the latest security features and updates. By restricting users from switching to the classic version, you can ensure that your users are always using the latest and most secure version of the platform.

User Experience: The lightning version of Salesforce offers a more modern and intuitive user interface that can help increase user adoption and productivity. By restricting users from switching to the classic version, you can encourage users to embrace the lightning version and take advantage of its many benefits.

Training Costs: If users are constantly switching between the classic and lightning versions of Salesforce, it can be difficult and costly to provide training on both versions. By restricting users from switching to the classic version, you can simplify your training process and reduce training costs.

How to Restrict Users from Switching to Classic

If you want to restrict users from switching to the classic version of Salesforce, you can do so by following these steps:

  1. Log in to Salesforce as an administrator.
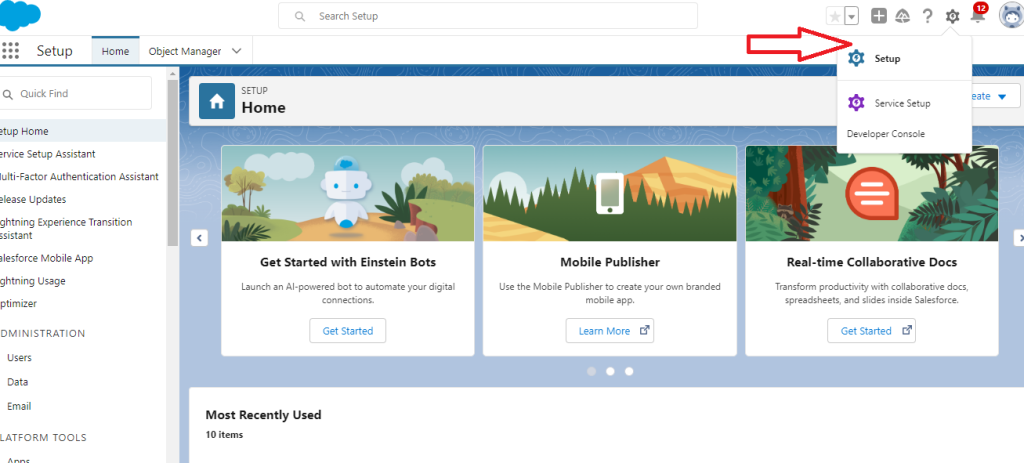
  2. Click on the gear icon in the top right corner of the screen and select “Setup.”

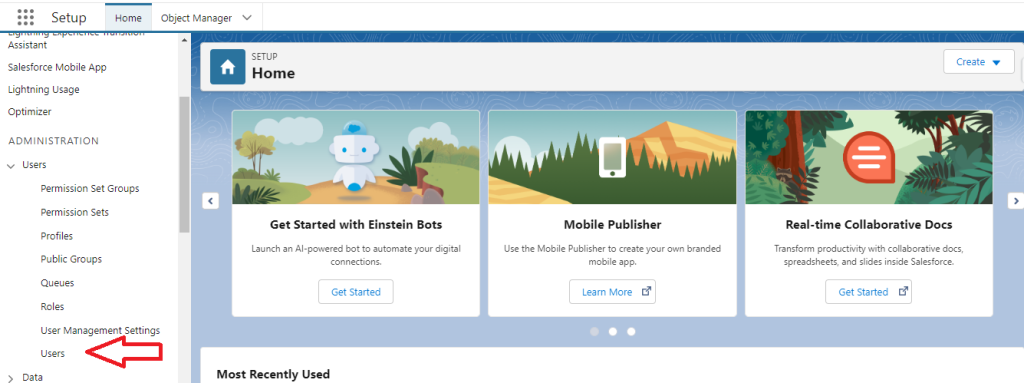
  1. In the left-hand menu, click on “Users” under the “Administer” section.
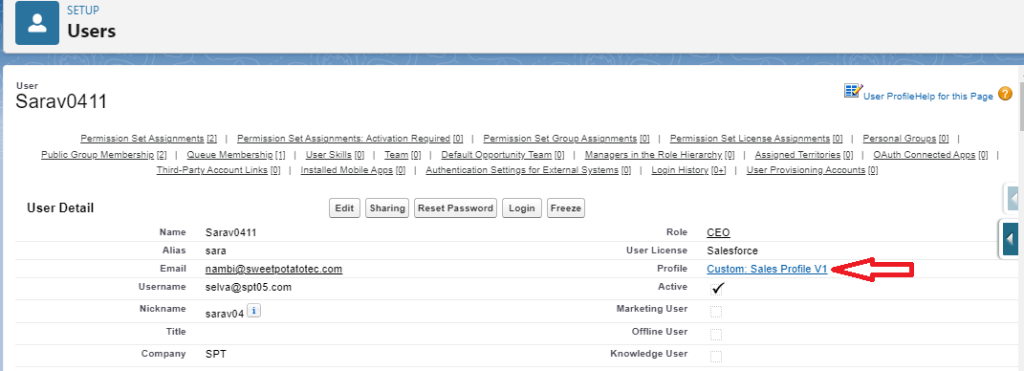
  1. Click on the name of the user that you want to restrict from switching to the classic version and click their profile name.
  1. Click the “Edit” button and scroll down to “Administrative Permissions” section, check the box next to “Hide Option to Switch to Salesforce Classic”

  1. Click on the “Save” button to save your changes.

By following these steps, you can restrict users from switching to the classic version of Salesforce for individual users. If you want to restrict all users from switching to the classic version, you can do so by creating a permission set that includes the “Hide Option to Switch to Salesforce Classic” permission and then assigning that permission set to all users.

Conclusion:

Restricting users from switching to the classic version of Salesforce can help ensure that your users are always using the latest and most secure version of the platform, improve user adoption and productivity, and reduce training costs. By following the steps outlined above, you can easily restrict users from switching to the classic version of Salesforce for individual users or all users in your organization.

Do you know there is an option to restrict the users from switching at the org level too? This blog covers it at the user level. We need to enable this at the org level to enable certain new features in Salesforce. We will cover this in another blog.

Categories
Blog

Homepage for different profiles

Introduction:

In Salesforce, the home page is what your users see the first time after logging in. This page can be customized to highlight specific information for the user. Easy access to relevant information equals increased efficiency. In this blog, we will discuss creating a homepage for different profiles in Salesforce. Assign home pages to different apps and app-and-profile combinations to give your users access to a Homepage perfect for their role.

Step 1: Determine the Objectives of Each Profile

The first step in creating a homepage for different profiles is to determine the objectives of each profile. Ask yourself, “What are the goals of this profile?” and “What data and functionality does this profile need to achieve those goals?” For example, a sales representative may need access to customer data, sales reports, and marketing materials. In contrast, a marketing specialist may require access to marketing campaigns, analytics, and lead-generation tools.

Step 2: Customize the Home Page Layout

Once you have determined the objectives of each profile, the next step is to customize the home page layout. Salesforce allows you to customize the home page for each profile, including adding and removing components and rearranging the layout. You can access the home page editor by clicking the gear icon in the top right corner of the screen and selecting “Edit Page” from the drop-down menu.

Step 3: Add Components to the Home Page

After accessing the home page editor, you can add components to the home page by clicking the “Add Component” button. Salesforce offers a variety of components to choose from, including charts, reports, dashboards, news, and updates. You can also add custom components created by your organization or third-party vendors.

Step 4: Configure Component Settings

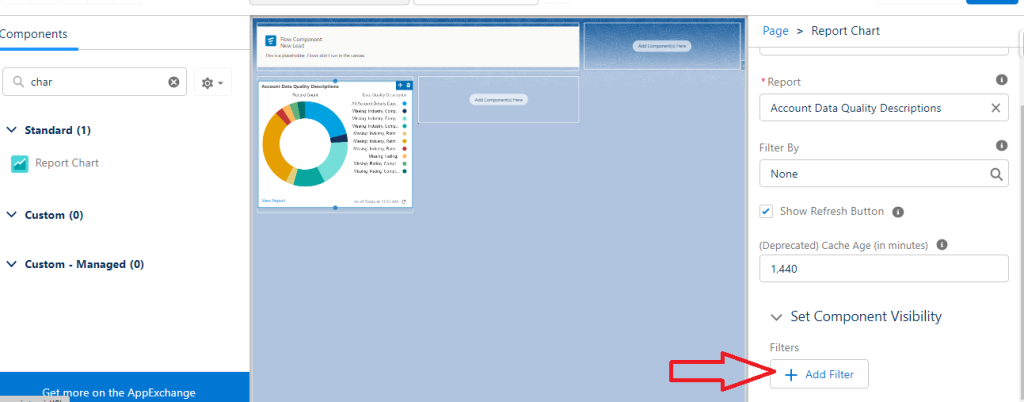
Once you have added components to the home page, you can configure their settings to show the data and functionality specific to each profile.

For example, you can set a chart component to display sales data for a sales representative profile and marketing campaign data for a marketing specialist profile.

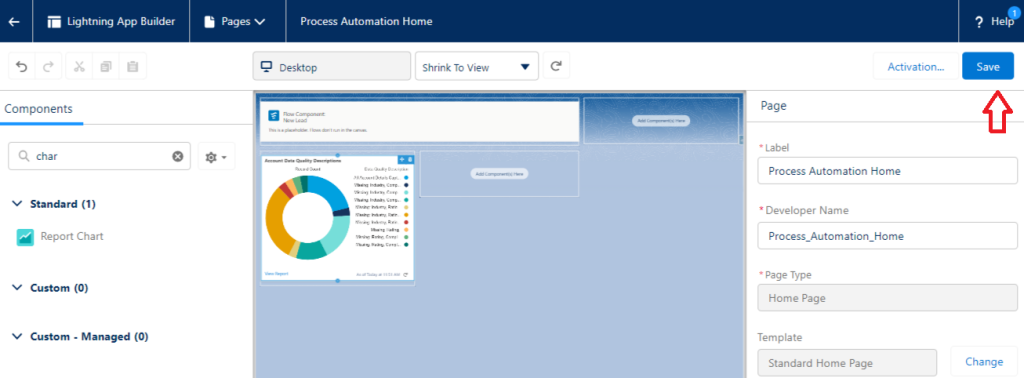
Step 5: Save and Publish the Home Page

After you have customized the home page for each profile and configured component settings, you can save and publish the home page. The changes will be visible to users with the corresponding profile permissions.

In conclusion, creating a homepage for different profiles in Salesforce requires an understanding of the objectives of each profile and the customization options available in the home page editor. By tailoring the home page layout, adding components, and configuring settings, you can provide users with the data and functionality they need to perform their job duties effectively.

Categories
Blog

Salesforce Instance Health Check-up

Generally believed that leading a wholesome lifestyle is positively correlated with leading a fruitful life. When we are in good physical and mental health, we are more likely to have the energy, focus, and motivation to pursue our goals and succeed in various aspects of our lives, including work, relationships, and personal growth.

We may also feel more satisfied and fulfilled, leading to greater happiness and well-being. As we age, we must pay more attention to our health, our bodies naturally undergo changes that can increase the risk of specific health problems and any possible issues that may arise.

However, with the proper care and attention, many of these issues can be prevented or managed effectively.

When people have health issues, they need to seek medical attention and consult with a doctor. A doctor can help diagnose the underlying cause of the problem and provide appropriate treatment to relieve symptoms and improve overall health and well-being.

However, if a problem occurs in Salesforce, how can we pinpoint the issues and who can analyse it ???

In this article, we will explore one of the self-service salesforce org health tools.

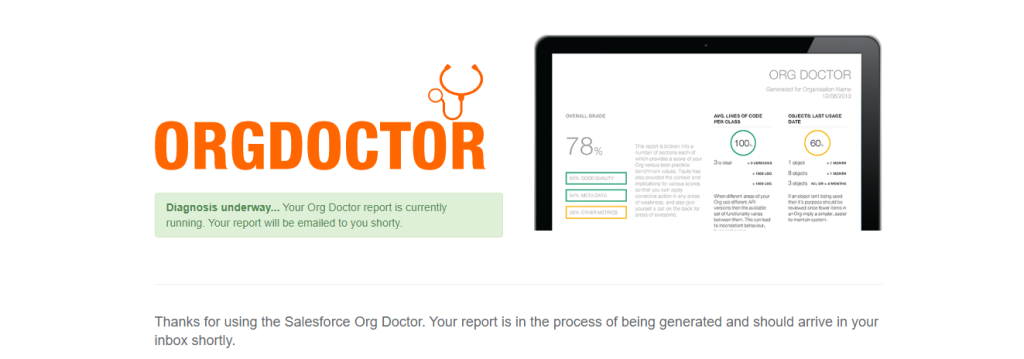
Yes…That is the Org Doctor !!!.  

The Org Doctor is a tool that helps you identify the changes that are not healthy for your organisation. It enables you to find and fix the problem’s root cause. The tool scans your org for possible issues and provides insights into what could have caused these problems in the first place.

Here are some signs that indicate that salesforce org is unwell.

  1. Surpass Storage Limits
  2. Frequent Record Locking Issues
  3. Operational or Performance issues
  •       Apex CPU time limit exceeded errors
  •       Long-running queries and reports
  •       Inefficient Visualforce pages and controllers
  •       Low code coverage in Apex test classes
  1. Need to increase security configurations.

Another question that comes to mind is:  Who can act as a doctor of the Salesforce Org?

Anyone with administrative rights can serve as a doctor, whether they are a Salesforce admin, developer, consultant, or anyone else. 

Finally, let’s take a look at how you can become an Org Doctor.

1. To begin, visit the following link: https://orgdoctor.herokuapp.com/

2. Check the checkbox that says  ‘I AM A SALESFORCE ADMINISTRATOR.’

3. Select either ‘Check My Production Org’ or ‘Check My Sandbox Org’.

4. After clicking the “Sign in with salesforce button”, Enter the Username and Password of Salesforce org and click the login button.

5. Finally, the health check report will be generated and sent to your email. The report is divided into different sections, with each section containing a percentage highlighted in either ‘Green’, ‘Red’, or ‘Yellow’.

Categories
Blog

Salesforce Easy makes your life Easy

The world is constantly evolving and so are the tools we use to make our lives easier.

Salesforce has recently launched Salesforce Easy to replace its existing Salesforce Essentials. Salesforce makes it easier for users to quickly access the data they need to make informed decisions about their customers. 

Working together to achieve goals is the key to success for any business. Salesforce Easy makes it easy for teams to collaborate in a single workspace. Makes it easy for teams to get started with collaboration and stay organized in the long run.

What is Salesforce Easy, And Who is it For?

Salesforce Easy is designed to make it easier for small and medium businesses to access the power of Salesforce without the need for extensive training or customization. With this Salesforce Easy, businesses can quickly get up and running with a powerful CRM system that will help them manage their customer relationships more efficiently.
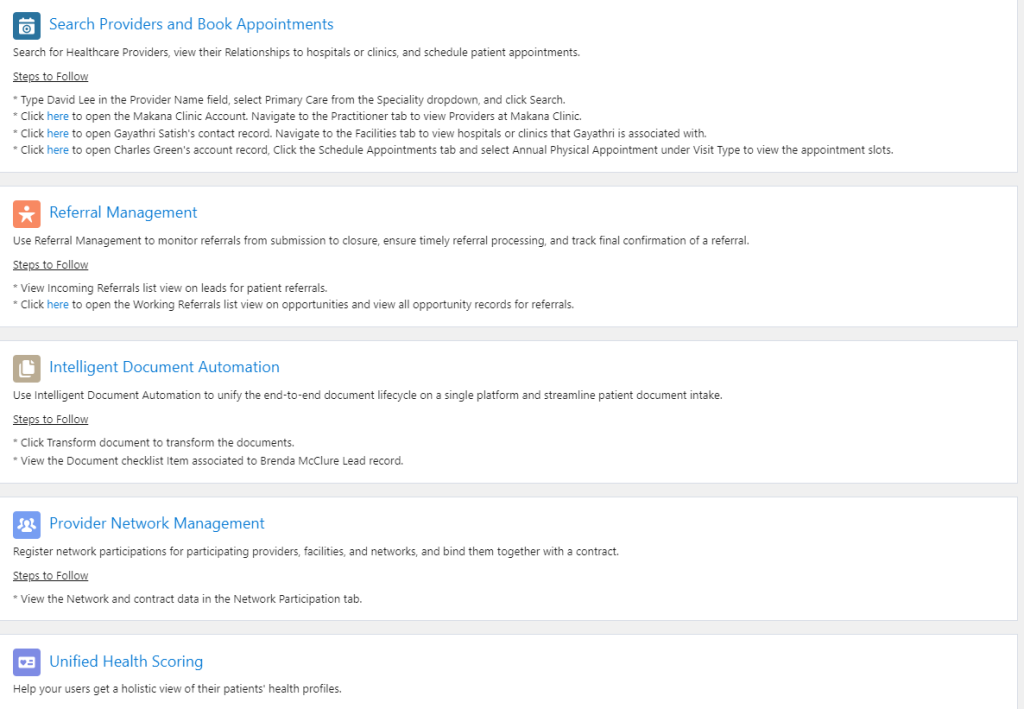
How Salesforce Easy Can Help Different Industries

Salesforce Easy is a revolutionary app that has completely reimagined the way businesses manage their sales, service, and marketing activities. With its simplified design, Salesforce Easy provides users with an intuitive user interface that makes it easy to access all the features necessary for effective sales, service, and marketing operations. Salesforce Easy allows users to customize according to their business needs and preferences. This makes it easier for businesses to manage their sales, service, and marketing activities in one unified platform.

How Salesforce Easy Helps Drive Efficiency in  Core Areas of Business 

Sales:

Out-of-the-box sales paths and reports are essential tools for businesses to keep their teams on track and manage their sales pipelines. 

Additionally, lead and opportunity records provide valuable insights into how well a company is performing in terms of customer acquisition and retention. With this information, companies can adjust their strategies in order to maximize their profits.

Service:

Managing customer cases is a great way to keep track of all customer interactions in one place. By tracking customer engagement history and details, businesses can gain valuable insights into how customers interact with their products and services. This data can then be used to improve their offerings as well as provide better support for their customers.

Designed to help your service team deliver quick, helpful, and personalized service to your customers.

Marketing:

It helps your marketing team create and track branded marketing content. Email templates are an essential tool for businesses when it comes to sending out company updates and offers. Not only do they provide a consistent look and feel for your emails, but they also help create beautifully branded emails that will grab the attention of your customers. With email templates, you can customize the content and design of your emails to match the tone of your brand.

Reports and Dashboards: 

Salesforce Easy gives a powerful suite of reporting tools to track business performance.

Reports will provide a clear picture to the management and display the data in the format of rows and columns.

Dashboards are pictorial representations of reports data.

How to Get Started with an Easier CRM Step by Step

Here are the steps to sign up for Salesforce Easy 30 days Trial Pack. 

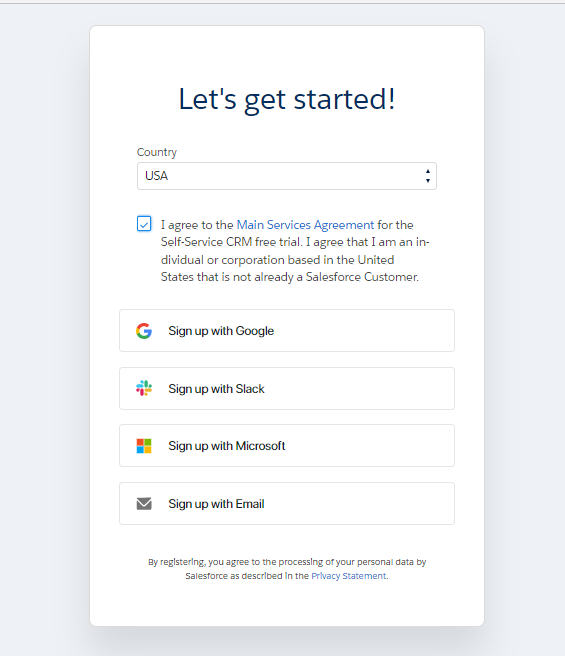
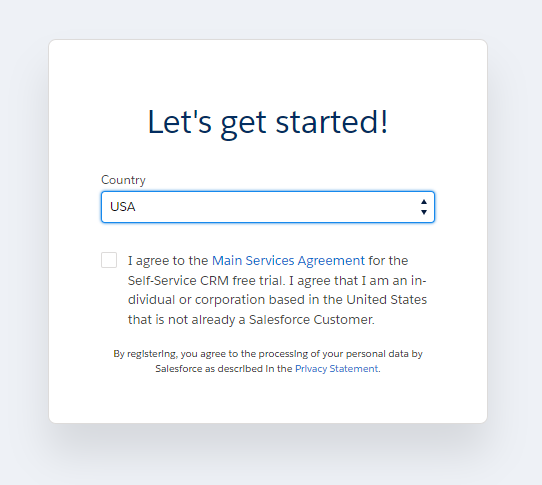
Step 1: Click this link Salesforce Easy. Select the country as USA. Then check the check box of “Main Service Agreement.”

Step 2: After selecting the Agreement check box, it shows Add to sign up 

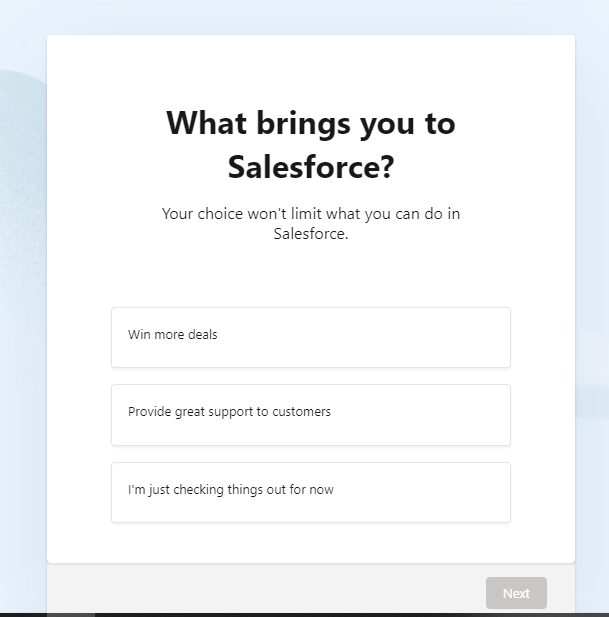
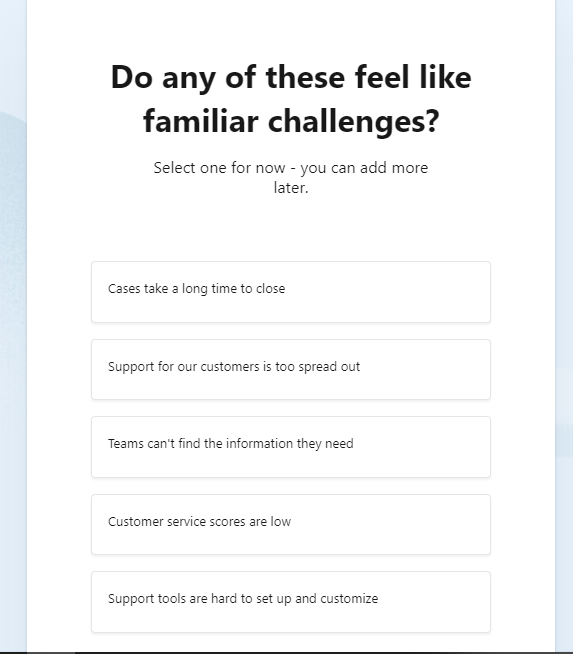
Step 3: After signing up, answer the following questions

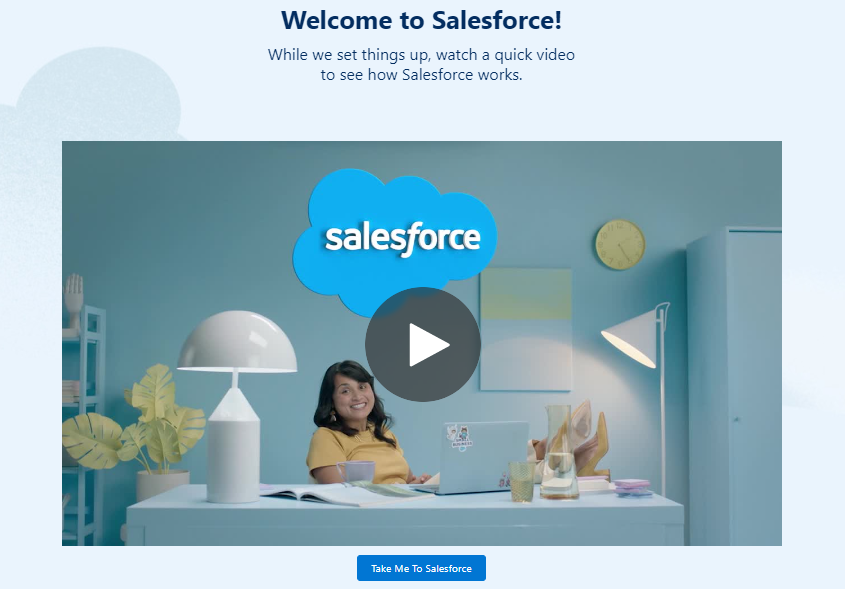
Step 4:Aftet submitting these questions, Select the “Take Me To Salesforce” button.

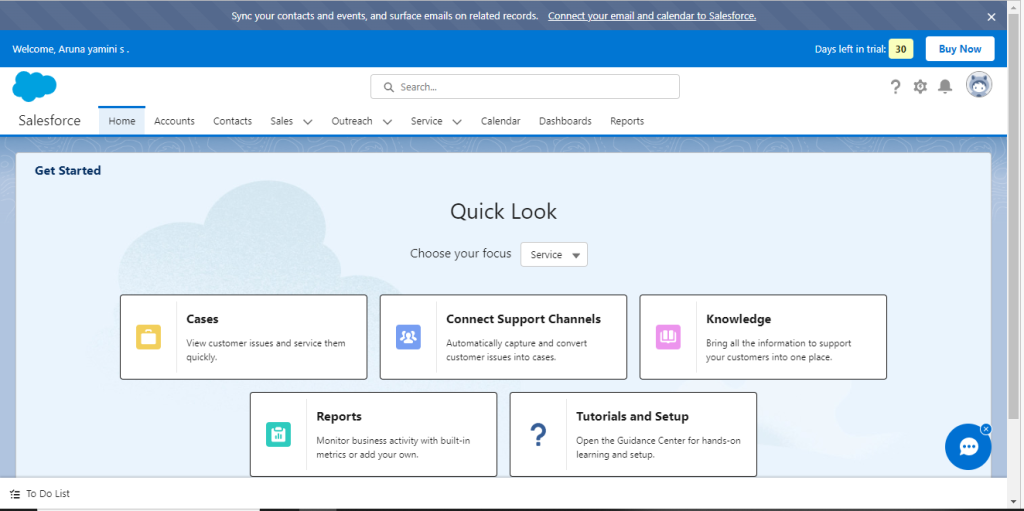
Kudos!!!, Finally, you get access to a 30-day Trial Pack.

Categories
Technical

How To Implement Omni Channel In Salesforce???

What Is Omni Channel? 

Omni Channel is a tool to manage the priority of work items without writing a code. It’s a flexible, customizable feature.Omni-Channel routes work requests to the most available and qualified support agents in the console.

Where Can This Be Used?

This can be used by people of teams who are managing,

      • Customer Support.
      • Call Centers
      • Patient Appointment etc.,
Steps To Implement Omni Channel:
Enable Omni-Channel
Create Service Channels
      1. Create Routing Configurations
      2. Configure Presence Configurations
      3. Create a Presence Status
      4. Create Decline Status
      5. Create Queues & Assign Queues to Routing Configurations
      6. Provide access to Presence Status
      7. Add Omni Channel to Console
      8. Test the Setup
1.Enable Omni-Channel

This step is simple – Goto Setup→Omni-Channel Settings→Enable Omni-Channel


2.Create Service Channels

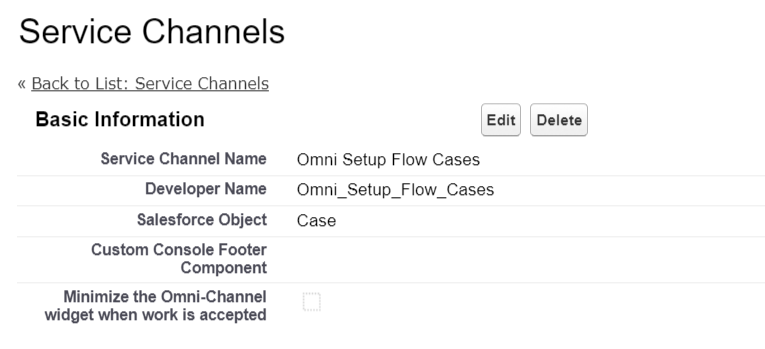
Service Channels: Service channels let you turn nearly any Salesforce object―such as a case, lead, SOS session, or even a custom object―into a work record.

Goto Setup→Omni-Channel Settings→Service Channels and click ‘New’. I have provided the name ‘Omni Channel Omni Setup Flow Cases.


3.Create Routing Configurations

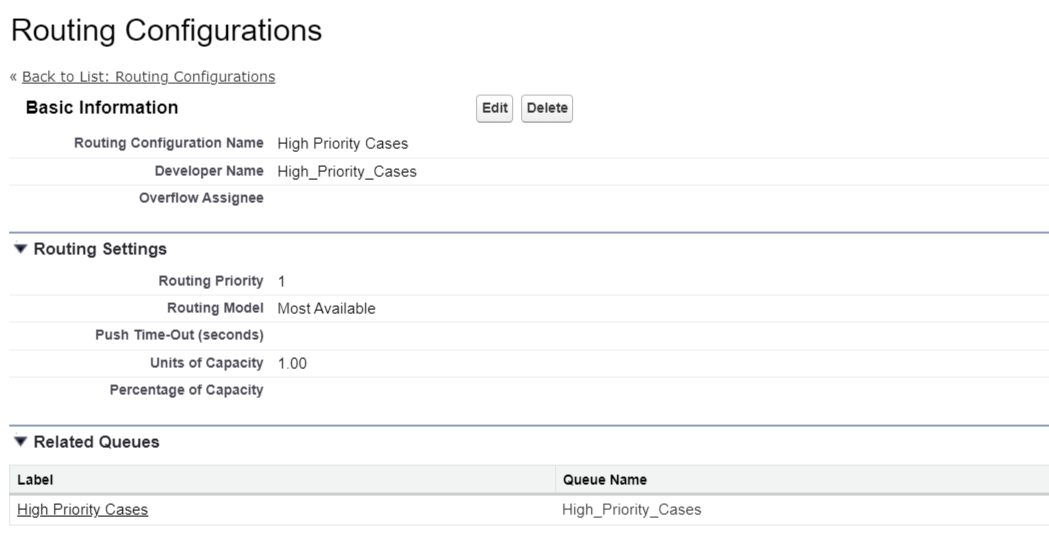
Routing Configurations: Routing configurations determine how work items are routed to agents. Use them to prioritize the relative importance and size of work items from your queues. That way, the most important work items are handled accordingly, and work is evenly distributed to your agents.

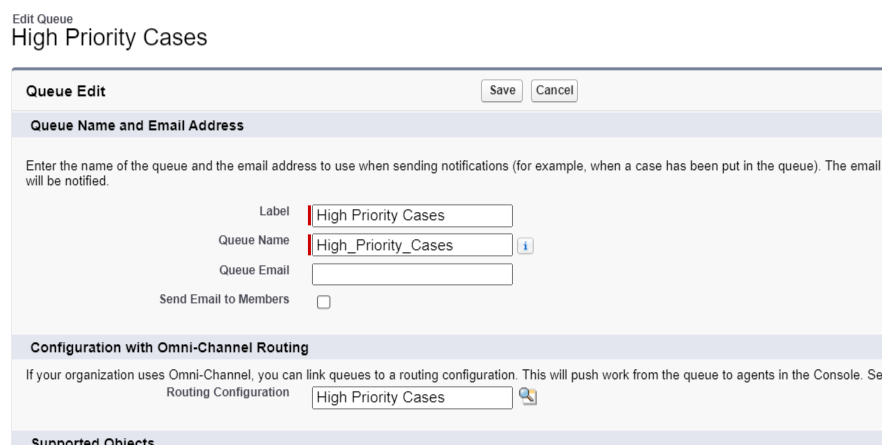
Goto Setup→Omni-Channel Settings→Routing Configurations and click ‘New’. I have provided the name High Priority Cases and should be routed to the Agent who is Most Available..


4.Configure Presence Configurations

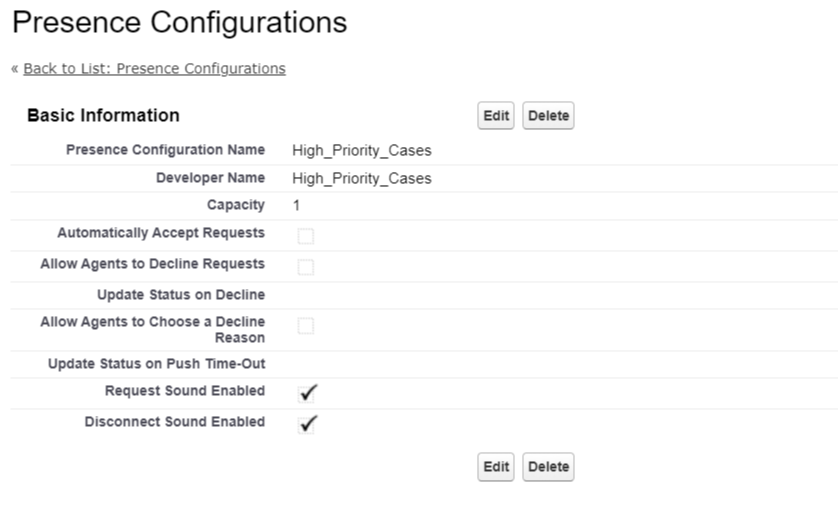
Presence Configuration: Presence configurations determine how much work agents can take on and the Omni-Channel behaviors while they assist customers. In each configuration, defining how to handle work requests, I have selected the capacity for an agent as 1.

Goto Setup→Omni-Channel Settings→Presence Configurations and click ‘New’ to create the configuration.
 

5.Create A Presence Status 

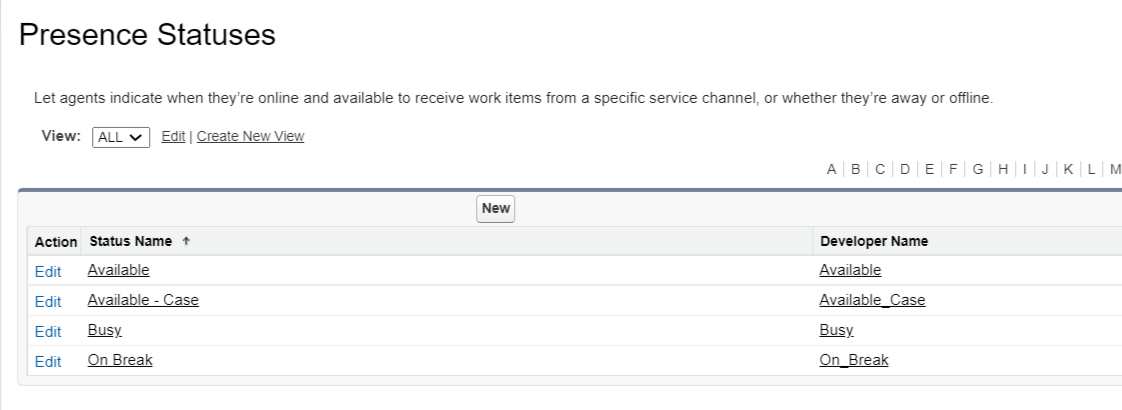
Presence Status: It helps you track information about your agents’ availability.

Goto Setup→Omni-Channel Settings→Presence Status and click ‘New’ to create the agent status.


6.Create Decline Status

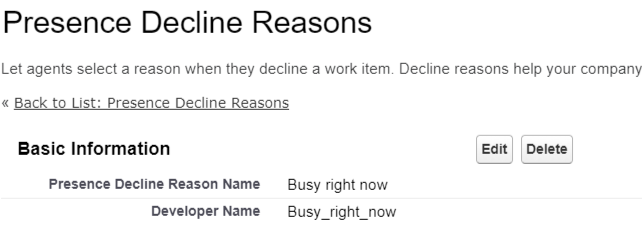
Presence Decline Status: This helps to track when any of the work is declined by the agents they can send this reason.

Goto Setup→Omni-Channel Settings→Presence Decline Reasons and click ‘New’ to create the reasons


7.Create Queues & Assign Queues To Routing Configurations

Goto Setup→Queues and Click New to create the Queue and assign it to the Routing Configuration.
 

8.Provide Access To Presence Status

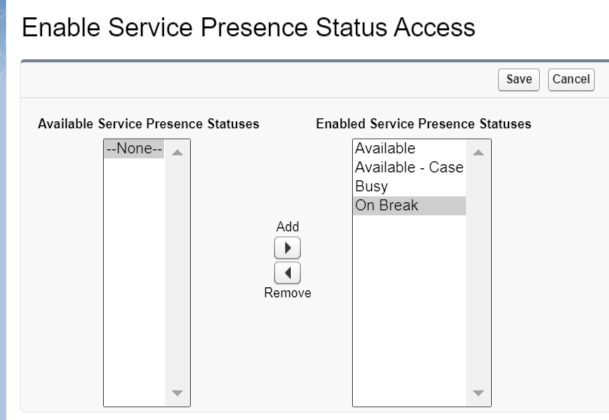
Goto Setup→Profile→ Enabled Service Presence Status Access and add the status.
 

9.Add Omni Channel To Console

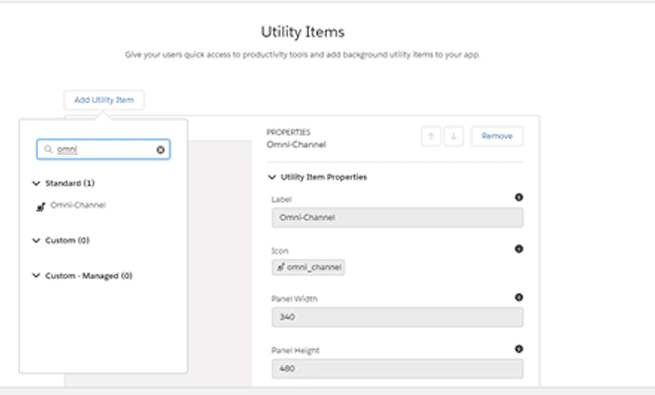
Goto Setup -> App -> App Manager.Click Service Console app and Add Omni Channel using “Add Utility Item”.


10.Test The Setup

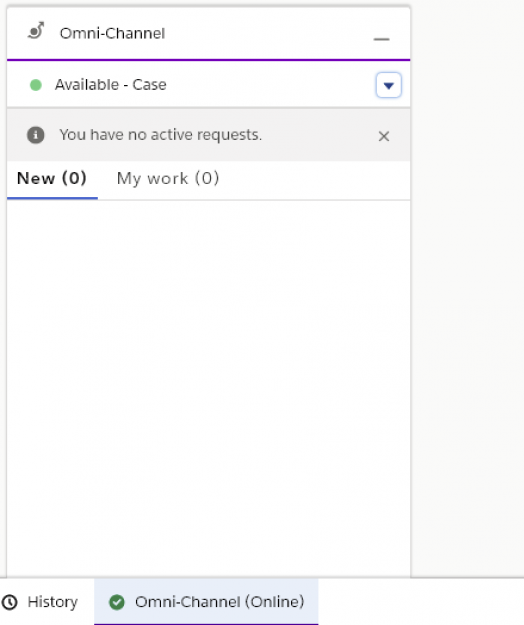
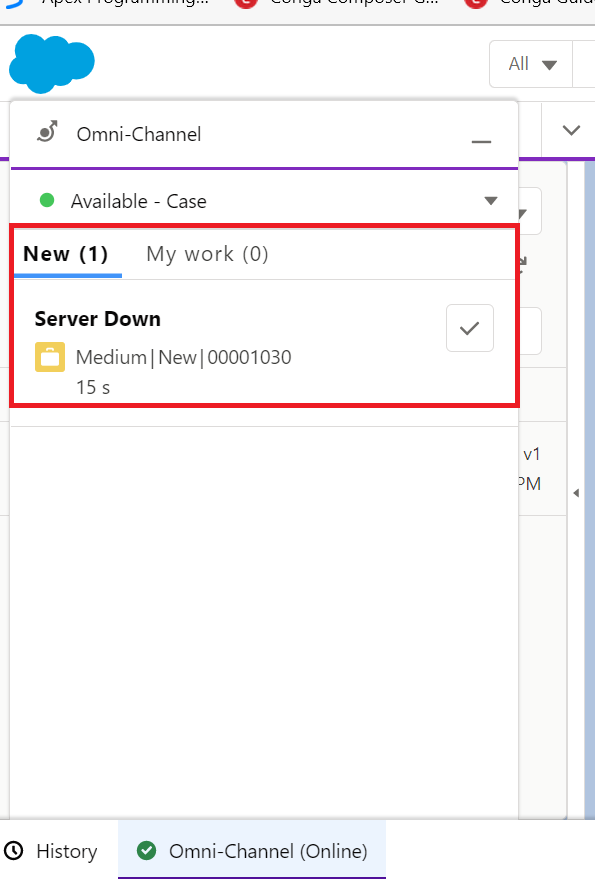
In Service Consoles, there is a Utility Bar item for Omni-Channel. This is where agents log on to Omni-Channel and show themselves as available for work. This is also where new incoming work will display for agents to grab.


When any new case is created and if it’s assigned to the queue then they will get an audio notification and the work will appear in their Omni-Channel window